How to use the ChoiceBox in JavaFX
Using the ChoiceBox in JavaFX is the same as using the JavaFX ComboBox in JavaFX. The JavaFX ChoiceBox is a parameterized class and this node in JavaFX is used for a small list of items. The ComboBox in JavaFX is the advanced version of the JavaFX ChoiceBox, and we will talk about the JavaFX ComboBox in the next tutorial.
The use of the ChoiceBox is to let the user select an item from the list of items declared in the parameter of the ChoiceBox. In this tutorial, you will learn how to use the ChoiceBox. Since you are a beginner, I will walk you through step-by-step creating the ChoiceBox and using it.
How does ChoiceBox work
Before we dive into the tutorial, you must understand how ChoiceBox works when you have a ChoiceBox in your JavaFX application. This control or node has four different states:
- The first state shows its initial state when there is no selection.
- The second state is when the node has focused and pressed the arrow keys by selecting an item.
- The third state shows the selected item and the pop-up menu is collapsed.
- And the fourth state shows the selected item when the pop-up menu is shown. It displays a checkmark in the pop-up menu.
JavaFX ChoiceBox Example
The following examples below will show you how to create the ChoiceBox, add items to select, get selected item, and teach you many more functionalities using the ChoiceBox in JavaFX. Please proceed below to learn more about ChoiceBox and let’s get started.
If you are using a Scene Builder to create your application, you can easily create the ChoiceBox in your application by simply dragging the node into the scene graph. Other than that, if you are not using the Scene Builder, you can simply initialize the choice box class in your code. Please proceed to the given example code snippet below to learn more about how to create the ChoiceBox in your JavaFX application.
// Create the choicebox in your Java Class.
ChoiceBox cb = new ChoiceBox();
Display the ChoiceBox to the Scene Graph
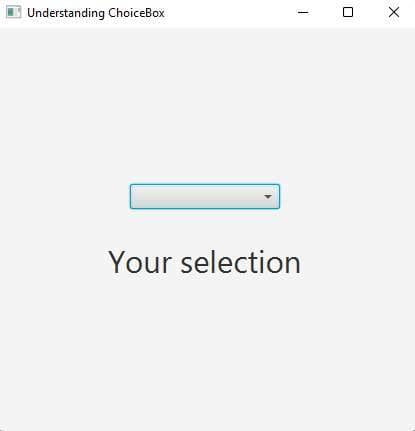
If you are using the FXML-based JavaFX application or using the SceneBuilder to make your GUI, you can load your fxml file to your Java code using the FXMLLoader and you can watch the video tutorial below to know how to use the FXMLLoader. You must also know how to use the layout in JavaFX. The below example will show you pure Java code to display the JavaFX ChoiceBox in your JavaFX application.
// Display the ChoiceBox in the SceneGraph
ChoiceBox cb = new ChoiceBox();
StackPane layout = new StackPane(cb);
Scene scene = new Scene(layout, 300, 400);
stage.setScene(scene);
stage.show();
Output
Adding Items to the ChoiceBox
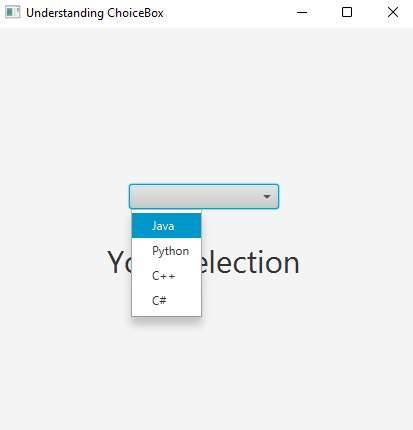
Adding items to the ChoiceBox is very easy to do since it is a parameterized class. You can specify the list of items using the Observable List or using the getItems().addAll() method. The following example below will show you how to add items to the ChoiceBox. Please see the following code snippet below.
// using the ObservableList
ObservableList<String> list = FXCollections.<String>observableArrayList("java", "Python","C++","C#");
ChoiceBox<String> cb = new ChoiceBox<>(list);

// using the Items property
ChoiceBox<String> cb = new ChoiceBox<>();
cb.getItems().addAll("java", "Python","C++","C#");
Output
Get the selected value
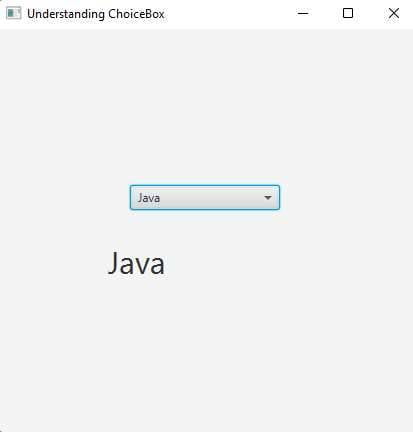
Once you have items in your JavaFX ChoiceBox, you must know how to get the selected value when you select an Item from the ChoiceBox. You need to use the getValue() method to get the selected value. The following code snippet below will show you how to get the selected value from the ChoiceBox in JavaFX.
// Getting the selected item
ChoiceBox<String> cb = new ChoiceBox<>();
cb.getItems().addAdd("java", "Python","C++","C#");
cb.setOnAction(this::getData);

// create a method getData(ActionEvent e)
private void getData(){
    String selected = cb.getValue();
    System.out.println(selected);
}
Output
Allowing null in the list of items
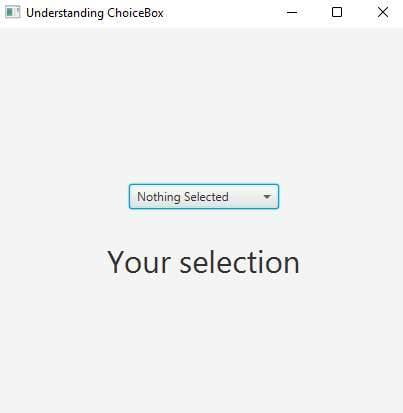
We can also add null to the list, allowing null can be used to say “Nothing selected” or “No selected item“. We can convert the null into a string to say something. Using the string converter can achieve that feature. The code snippet below will show you how to convert the null into a string.
ChoiceBox<String> cb = new ChoiceBox<>();
cb.getItems().addAll(null,"Java","Python","C++","JavaScript");

cb.setConverter(new StringConverter<String>(){
    @Override
    public String toString(String s) { return (s == null) ? "Nothing Selected" : s; }

    @Override
    public String fromString(String s) { return null; }
});
Output
Selection Model
There is so much to learn about the selection model, you can select the first, next, previous, and last item from the ChoiceBox. You can also clear the selection method. This means it clears the selected item and returns to a state that no item had been selected. See the following code snippet below to learn more.
// The first item will be selected
cb.getSelectionModel().selectFirst();

// The next item will be selected
cb.getSelectionModel().selectNext();

// The previous item will be selected
cb.getSelectionModel().selectPrevious();

// The last item will be selected
cb.getSelectionModel().selectLast();

// Clears the selection
cb.getSelectionModel().clearSelection();
Watch the video tutorial below if you want a video-based tutorial. If you want to learn more about JavaFX, you can go here.


