Master JavaFX Pie Charts effortlessly with our beginner-friendly guide, providing step-by-step instructions for setting up, coding, and styling interactive charts.
Key Takeaway:
- JavaFX Pie Charts simplify data visualization by displaying data in engaging, circular graphs.
- Essential steps include setting up your environment, adding libraries, and coding.
- Customize with CSS for enhanced visual appeal.
How to Use the JavaFX Pie Chart
Have you ever wondered how to visualize data in a more engaging and visually appealing way using JavaFX? Well, you’re in the right place! In today’s blog post, I’m diving deep into the world of the JavaFX Pie Chart. Whether you’re a seasoned developer or just getting started, this guide will be your go-to resource for creating dynamic and interactive pie charts using JavaFX. So let’s get started!
Introduction to JavaFX Pie Charts
JavaFX provides an extensive framework for building rich graphical user interfaces (GUIs). One of the most useful and visually effective components is the Pie Chart. A JavaFX Pie Chart allows you to display data in a circular graph divided into slices, making it easier to understand complex data sets at a glance.
Why Use a Pie Chart?
Before we jump into the coding part, you might ask: Why even use a pie chart? Well, pie charts are incredibly effective for showing the relative proportions of different categories in a data set. They are easy to understand and can be very informative when used correctly. From business presentations to educational materials, pie charts help convey information clearly and succinctly.
Setting Up Your JavaFX Environment
To create a JavaFX Pie Chart, you’ll need to have Java Development Kit (JDK) installed along with an Integrated Development Environment (IDE) like IntelliJ IDEA or Eclipse.
- Install JDK: Download and install the latest version of the JDK from Oracle’s website.
- IDE Setup: Download and install an IDE such as IntelliJ IDEA or Eclipse.
Creating Your First JavaFX Pie Chart
Alright, let’s get our hands dirty with some code! We’ll start by creating a simple JavaFX Pie Chart step-by-step.
Step 1: Set Up Your Project
First things first, create a new JavaFX project in your IDE. If you’re using IntelliJ IDEA:
- Open IntelliJ IDEA and select
New Project. - Choose
JavaFXfrom the list of templates. - Configure your project settings and click
Finish.
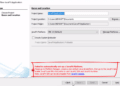
Step 2: Adding JavaFX Libraries
Ensure that your project is set up with JavaFX libraries. You might need to add the JavaFX SDK to your project manually.
- Download the JavaFX SDK from Gluon.
- Configure your project to include the JavaFX libraries.
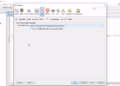
Step 3: Coding the Main Class
Once you’ve created a new JavaFX Project in Intellij IDEA, it will create the boilerplate. So head over to your Main class and copy the code below.
package com.kensoftph.javafxpiechart;

import javafx.application.Application;
import javafx.fxml.FXMLLoader;
import javafx.scene.Scene;
import javafx.stage.Stage;

import java.io.IOException;

public class HelloApplication extends Application {
    @Override
    public void start(Stage stage) throws IOException {
        FXMLLoader fxmlLoader = new FXMLLoader(HelloApplication.class.getResource("hello-view.fxml"));
        Scene scene = new Scene(fxmlLoader.load());
        stage.setTitle("World Population");
        stage.setScene(scene);
        stage.show();
    }

    public static void main(String[] args) {
        launch();
    }
}
Step 4: Coding the FXML File
If you have a scene builder, you can configure or develop your desired interface for your application. Otherwise, copy the code below to match the given example.
<?xml version="1.0" encoding="UTF-8"?>

<?import javafx.geometry.Insets?>
<?import javafx.scene.chart.PieChart?>
<?import javafx.scene.control.Label?>
<?import javafx.scene.layout.BorderPane?>
<?import javafx.scene.text.Font?>


<BorderPane maxHeight="-Infinity" maxWidth="-Infinity" minHeight="-Infinity" minWidth="-Infinity" prefHeight="600.0" prefWidth="800.0" xmlns="http://javafx.com/javafx/18" xmlns:fx="http://javafx.com/fxml/1" fx:controller="com.kensoftph.javafxpiechart.HelloController">
   <top>
      <Label text="Top 5" BorderPane.alignment="CENTER">
         <font>
            <Font size="40.0" />
         </font>
         <padding>
            <Insets bottom="10.0" />
         </padding>
      </Label>
   </top>
   <center>
      <PieChart fx:id="pieChart" BorderPane.alignment="CENTER" />
   </center>
</BorderPane>
Step 5: Creating another class for the Data handler
Create another Java class and this class will serve as the data handler for our JavaFX Pie Chart. Copy the code below.
package com.kensoftph.javafxpiechart;
import javafx.collections.FXCollections;
import javafx.collections.ObservableList;
import javafx.scene.chart.PieChart;
public class PieChartData {
public static ObservableList<PieChart.Data> getChartData() {
ObservableList<PieChart.Data> data = FXCollections.observableArrayList();
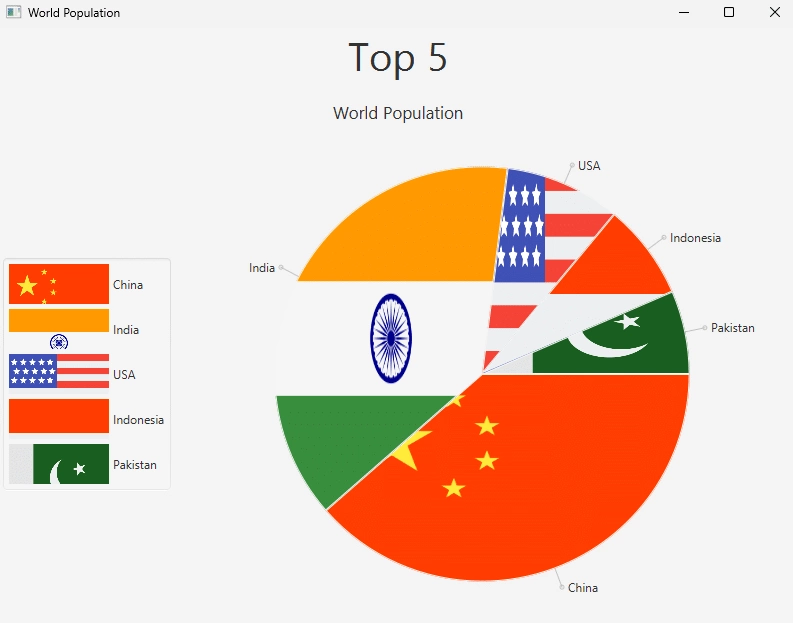
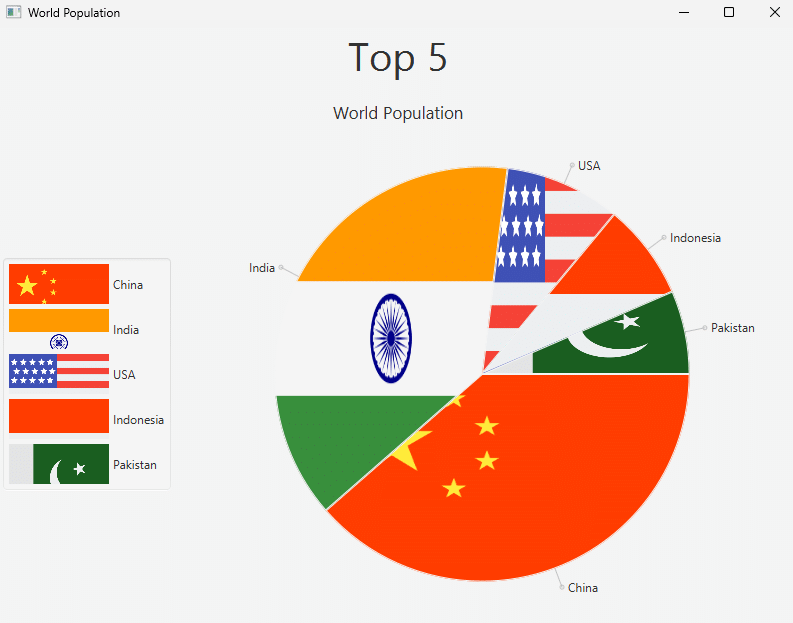
data.add(new PieChart.Data("China", 1425000000));
data.add(new PieChart.Data("India", 1419000000));
data.add(new PieChart.Data("USA", 333500000));
data.add(new PieChart.Data("Indonesia", 276700000));
data.add(new PieChart.Data("Pakistan", 240500000));
return data;
}
}
Step 6: Controller Class
This controller class is connected to our FXML file.
package com.kensoftph.javafxpiechart;

import javafx.application.Platform;
import javafx.fxml.FXML;
import javafx.fxml.Initializable;
import javafx.geometry.Side;
import javafx.scene.Scene;
import javafx.scene.chart.PieChart;

import java.net.URL;
import java.util.Objects;
import java.util.ResourceBundle;

public class HelloController implements Initializable {
    @FXML
    private PieChart pieChart;

    @Override
    public void initialize(URL url, ResourceBundle resourceBundle) {
        pieChart.setTitle("World Population");
        pieChart.setLegendVisible(true);
        pieChart.setLegendSide(Side.LEFT);
        pieChart.setData(PieChartData.getChartData());

        Platform.runLater(() -> {
            Scene scene = pieChart.getScene();
            String cssPath = Objects.requireNonNull(HelloController.class.getResource("pie.css")).toExternalForm();
            scene.getStylesheets().add(cssPath);
        });
    }
}
Styling with CSS
JavaFX allows you to apply CSS to your components for better visual customization.
Create a CSS file named pie.css in your project:
.chart-pie.data0 {
    -fx-background-image: url("./flag/china.png");
    -fx-background-size: cover;
    -fx-background-position: center;
    -fx-background-repeat: repeat;
}

.chart-pie.data1 {
    -fx-background-image: url("./flag/india.png");
    -fx-background-size: cover;
    -fx-background-position: center;
    -fx-background-repeat: repeat;
}

.chart-pie.data2 {
    -fx-background-image: url("./flag/usa.png");
    -fx-background-size: cover;
    -fx-background-position: center;
    -fx-background-repeat: repeat;
}

.chart-pie.data3 {
    -fx-background-image: url("./flag/indonesia.png");
    -fx-background-size: cover;
    -fx-background-position: center;
    -fx-background-repeat: repeat;
}

.chart-pie.data4 {
    -fx-background-image: url("./flag/pakistan.png");
    -fx-background-size: cover;
    -fx-background-position: center;
    -fx-background-repeat: repeat;
}

.chart-legend-item-symbol {
    -fx-pref-width: 100;
    -fx-pref-height: 40;
}
Output
Final Thoughts and Tips
Creating a JavaFX Pie Chart is not only straightforward but also fun. It makes data visualization intuitive and visually appealing. Here are a few closing tips to keep in mind:
- Experiment with Data: Don’t be afraid to experiment with different data sets and see how the pie chart can best represent your information.
- Explore CSS: Utilize CSS for better styling and customization. It can transform a basic pie chart into something more appealing.
- Interactive Elements: Add interactive elements to make your charts responsive to user actions.
Now that you have a comprehensive understanding of how to create and customize JavaFX Pie Charts, why not give it a try? Experiment with your data, customize the visuals, and share your creations. And if you have any questions or run into issues, feel free to leave a comment below. I’d love to hear from you and see what you come up with!
Question: How do you create a JavaFX Pie Chart for beginners?
To create a JavaFX Pie Chart, set up your environment with JDK and an IDE like IntelliJ. Add JavaFX libraries, code your main class, and style with CSS for better visualization. Follow our step-by-step guide for effortless implementation.
YouTube Video