One of the greatest and most useful control in JavaFX is TableView. Table View in JavaFX is used to display and edit data in a tabular form. In this tutorial, I will show you the process of creating and using the JavaFX TableView and by the end of this tutorial, you learn how to use the Table View in JavaFX and create a simple application that will allow the user to insert, edit and remove data from the TableView.
JavaFX Table View is similar to Google Sheets or Microsoft Excel which displays data in rows and columns. The table view in JavaFX consists of three main parts which are the table itself which is the container of the table columns and data. The other part is the table column, which defines the column of data that is displayed, edited or removed.
How to use the Table View in JavaFX
Alright, to create and implement this control in our JavaFX application, you need to create a table view object using the TableView class. After you’ve created the TableView, you’ll need to add it to the SceneGraph to make it visible in our application. But tableview itself isn’t enough to make our table work out, so we also need to create the TableColumn and add it to our table view.
Okay, let’s dive into creating the table in our JavaFX program. In the following example, we’ll use the TableView class to create a TableView control. The example code given below will create a table view that will use objects of the Person class as its items. As you’ve read about Person class, you need to create another class called Person.
Let’s get started! Please take a look at the given code below to see how to create a Table View in JavaFX without using the FXML file and the controller Class. Later in this example, I will also show you how to create the table view with FXML or you can watch my YouTube video below.
import javafx.application.Application;
import javafx.scene.Scene;
import javafx.scene.control.TableView;
import javafx.scene.layout.StackPane;
import javafx.stage.Stage;

import java.io.IOException;

public class Main extends Application {
    @Override
    public void start(Stage stage) {

        TableView<Person> tableView = new TableView<>(Person.getInitialList());
        tableView.getColumns().addAll(Person.getFistNameCol(), Person.getLastNameCol(), Person.getOriginCol());
        tableView.setColumnResizePolicy(TableView.CONSTRAINED_RESIZE_POLICY);

        StackPane layout = new StackPane(tableView);

        Scene scene = new Scene(layout, 400, 400);
        stage.setScene(scene);
        stage.setTitle("TableView in JavaFX");

        stage.show();
    }

    public static void main(String[] args) {
        launch();
    }
}
The following code below will be the person class that is used in the main class. Make sure to create a new class named Person and copy the code below.
import javafx.collections.FXCollections;
import javafx.collections.ObservableList;
import javafx.scene.control.TableColumn;
import javafx.scene.control.cell.PropertyValueFactory;

public class Person {
    private String firstName;
    private String lastName;
    private String origin;

    public String getFirstName() {
        return firstName;
    }

    public void setFirstName(String firstName) {
        this.firstName = firstName;
    }

    public void setLastName(String lastName) {
        this.lastName = lastName;
    }

    public void setOrigin(String origin) {
        this.origin = origin;
    }

    public String getLastName() {
        return lastName;
    }

    public String getOrigin() {
        return origin;
    }

    public static ObservableList<Person> getInitialList() {
        Person p1 = new Person("Chris", "James", "US");
        Person p2 = new Person("James", "Brown", "US");
        Person p3 = new Person("Jake", "Buck", "US");
        Person p4 = new Person("Blake", "David", "US");
        return FXCollections.observableArrayList(p1, p2, p3, p4);
    }

    public static TableColumn<Person, String> getFistNameCol(){
        TableColumn<Person, String> fNameCol = new TableColumn<>("First Name");
        fNameCol.setCellValueFactory(new PropertyValueFactory<>("firstName"));
        return fNameCol;
    }

    public static TableColumn<Person, String> getLastNameCol(){
        TableColumn<Person, String> lNameCol = new TableColumn<>("Last Name");
        lNameCol.setCellValueFactory(new PropertyValueFactory<>("lastName"));
        return lNameCol;
    }

    public static TableColumn<Person, String> getOriginCol(){
        TableColumn<Person, String> originCol = new TableColumn<>("Origin");
        originCol.setCellValueFactory(new PropertyValueFactory<>("origin"));
        return originCol;
    }

    public Person(String firstName, String lastName, String origin) {
        this.firstName = firstName;
        this.lastName = lastName;
        this.origin = origin;
    }
}
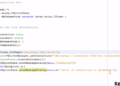
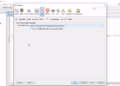
The output of this code will be showing the table view in JavaFX and displays four dummy person names from the Person class.

Alright, as you can see in the code from the Person class, there are methods called getFirsNameCol(), getLastNameCol() and getOriginCol(). These methods are used to create the TableColumn if you wondered how to create the table column in this way of creating the table view in JavaFX. Okay let’s take one of the TableColumn methods to explain how it works.
- In this line of code
public static TableColumn<Person, String> getOriginCol()declares a getOriginCol() method that returns the Table Column and has two parameters indicating the Person class and String which is used for displaying string type data and is associated with the Person class. - This line of code
TableColumn<Person, String> originCol = new TableColumn<>("Origin");creates a new TableColumn object named originCol and the TableColumn constructor takes the string which is “Origin” that represents the table column header text or the title of the table column. - This code is responsible for retrieving the the data to show or display in the table column cell.
originCol.setCellValueFactory(new PropertyValueFactory<>("origin")); - and the return originCol; returns the originCol object as the result of its method which is getOriginCol();
The following lines of code are to display the data in our Table View in JavaFX, you’ll need to create the Table View in your main class. You can take a look at the given code below. The code will create the TableView and add the TableColumn objects from the Person class.
TableView<Person> tableView = new TableView<>(Person.getInitialList());
tableView.getColumns().addAll(Person.getFistNameCol(), Person.getLastNameCol(), Person.getOriginCol());
How to insert new data into Table View in JavaFX
In this example of our Table view in JavaFX, you will learn how to insert new data and we’ll assume that we have a JavaFX Button handling this block of code below. We will still use the Person class for the data. Please proceed to the following code below to see how it works.
Person newData = new Person(txtFName.getText(), txtLName.getText(), txtOrigin.getText());
table.getItems().add(newData);
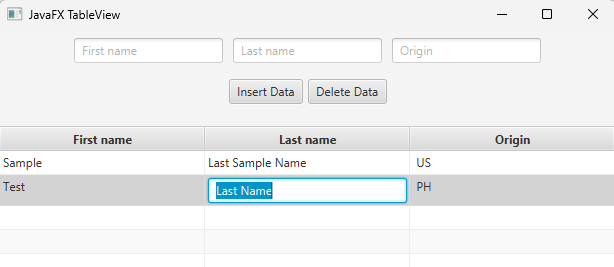
How to edit data from the TableView in JavaFX
You already know how to add new data in the JavaFX TableView and next basic part that you need to know is by editing the data by selecting it directly from the Table View in JavaFX. I’m going to put the edit code in a method and you need to call this method inside the initialize() method. Don’t forget to make the Table View in JavaFX editable to true. tableView.setEditable(true);
private void editData(){
    firstName.setCellFactory(TextFieldTableCell.<Person>forTableColumn());
    firstName.setOnEditCommit(event ->{
        Person person = event.getTableView().getItems().get(event.getTablePosition().getRow());
        person.setFirstName(event.getNewValue());
        System.out.println(person.getLastName() + "'s Name was updated to "+ event.getNewValue() +" at row "+ (event.getTablePosition().getRow() + 1));
    });

    lastName.setCellFactory(TextFieldTableCell.<Person>forTableColumn());
    lastName.setOnEditCommit(event ->{
        Person person = event.getTableView().getItems().get(event.getTablePosition().getRow());
        person.setLastName(event.getNewValue());
        System.out.println(person.getFirstName() + "'s Last Name was updated to "+ event.getNewValue() +" at row "+ (event.getTablePosition().getRow() + 1));
    });

    origin.setCellFactory(TextFieldTableCell.<Person>forTableColumn());
    origin.setOnEditCommit(event ->{
        Person person = event.getTableView().getItems().get(event.getTablePosition().getRow());
        person.setOrigin(event.getNewValue());
        System.out.println("Origin was updated to "+ event.getNewValue() +" at row "+ (event.getTablePosition().getRow() + 1));
    });
}
Output
How to delete data from JavaFX TableView
Let’s proceed to deleting data into table view in JavaFX since you already know how to add and edit data in TableView. Let’s assume that these lines of code below are handled by a button.
    TableView.TableViewSelectionModel<Person> selectionModel = table.getSelectionModel();
    if(selectionModel.isEmpty()){
        System.out.println("You need select a data before deleting.");
    }

    ObservableList<Integer> list = selectionModel.getSelectedIndices();
    Integer[] selectedIndices = new Integer[list.size()];
    selectedIndices = list.toArray(selectedIndices);

    Arrays.sort(selectedIndices);

    for(int i = selectedIndices.length - 1; i >= 0; i--){
        selectionModel.clearSelection(selectedIndices[i].intValue());
        table.getItems().remove(selectedIndices[i].intValue());
    }
How to use the Table View in JavaFX with FXML
In this example, I’ll provide with you the code for creating the table view in JavaFX with FXML file. You can also watch my Youtube video below to see how it works. The first code snippet will be the Main class and to be followed by the Person.java, the fxml file and its controller class.
Main.java
import javafx.application.Application;
import javafx.fxml.FXMLLoader;
import javafx.scene.Scene;
import javafx.scene.control.TableView;
import javafx.scene.layout.StackPane;
import javafx.stage.Stage;

import java.io.IOException;

public class Main extends Application {
    @Override
    public void start(Stage stage) throws IOException {
        FXMLLoader loader = new FXMLLoader(getClass().getResource("table-view.fxml"));
        Scene scene = new Scene(loader.load());
        stage.setTitle("JavaFX TableView");
        stage.setScene(scene);


        // these lines of code here will be creating the tableview without using an FXML file
        /*TableView<Person> tableView = new TableView<>(Person.getInitialList());
        tableView.getColumns().addAll(Person.getFistNameCol(), Person.getLastNameCol(), Person.getOriginCol());
        tableView.setColumnResizePolicy(TableView.CONSTRAINED_RESIZE_POLICY);

        StackPane layout = new StackPane(tableView);

        Scene scene = new Scene(layout, 400, 400);
        stage.setScene(scene);
        stage.setTitle("TableView in JavaFX");*/
        // end

        stage.show();
    }

    public static void main(String[] args) {
        launch();
    }
}
Person.java
import javafx.collections.FXCollections;
import javafx.collections.ObservableList;
import javafx.scene.control.TableColumn;
import javafx.scene.control.cell.PropertyValueFactory;

public class Person {
    private String firstName;
    private String lastName;
    private String origin;

    public String getFirstName() {
        return firstName;
    }

    public void setFirstName(String firstName) {
        this.firstName = firstName;
    }

    public void setLastName(String lastName) {
        this.lastName = lastName;
    }

    public void setOrigin(String origin) {
        this.origin = origin;
    }

    public String getLastName() {
        return lastName;
    }

    public String getOrigin() {
        return origin;
    }

    // this code is for retrieving any data without using the FXML
    public static ObservableList<Person> getInitialList() {
        Person p1 = new Person("Chris", "James", "US");
        Person p2 = new Person("James", "Brown", "US");
        Person p3 = new Person("Jake", "Buck", "US");
        Person p4 = new Person("Blake", "David", "US");
        return FXCollections.observableArrayList(p1, p2, p3, p4);
    }

    public static TableColumn<Person, String> getFistNameCol(){
        TableColumn<Person, String> fNameCol = new TableColumn<>("First Name");
        fNameCol.setCellValueFactory(new PropertyValueFactory<>("firstName"));
        return fNameCol;
    }

    public static TableColumn<Person, String> getLastNameCol(){
        TableColumn<Person, String> lNameCol = new TableColumn<>("Last Name");
        lNameCol.setCellValueFactory(new PropertyValueFactory<>("lastName"));
        return lNameCol;
    }

    public static TableColumn<Person, String> getOriginCol(){
        TableColumn<Person, String> originCol = new TableColumn<>("Origin");
        originCol.setCellValueFactory(new PropertyValueFactory<>("origin"));
        return originCol;
    }

    // end of the code without using an FXML file

    public Person(String firstName, String lastName, String origin) {
        this.firstName = firstName;
        this.lastName = lastName;
        this.origin = origin;
    }
}
table-view.fxml
<?xml version="1.0" encoding="UTF-8"?>

<?import javafx.geometry.Insets?>
<?import javafx.scene.control.Button?>
<?import javafx.scene.control.TableColumn?>
<?import javafx.scene.control.TableView?>
<?import javafx.scene.control.TextField?>
<?import javafx.scene.layout.BorderPane?>
<?import javafx.scene.layout.HBox?>
<?import javafx.scene.layout.VBox?>

<BorderPane maxHeight="-Infinity" maxWidth="-Infinity" minHeight="-Infinity" minWidth="-Infinity" prefHeight="474.0" prefWidth="617.0" xmlns="http://javafx.com/javafx/18" xmlns:fx="http://javafx.com/fxml/1" fx:controller="com.kensoftph.tableview.TableViewController">
   <center>
      <TableView fx:id="table" editable="true" prefHeight="200.0" prefWidth="200.0" BorderPane.alignment="CENTER">
        <columns>
          <TableColumn fx:id="firstName" prefWidth="75.0" text="First name" />
          <TableColumn fx:id="lastName" prefWidth="75.0" text="Last name" />
            <TableColumn fx:id="origin" prefWidth="75.0" text="Origin" />
        </columns>
         <columnResizePolicy>
            <TableView fx:constant="CONSTRAINED_RESIZE_POLICY" />
         </columnResizePolicy>
      </TableView>
   </center>
   <top>
      <VBox alignment="CENTER" prefHeight="96.0" prefWidth="617.0" BorderPane.alignment="CENTER">
         <children>
            <HBox alignment="CENTER" prefHeight="100.0" prefWidth="200.0" spacing="10.0">
               <children>
                  <TextField fx:id="txtFName" promptText="First name" />
                  <TextField fx:id="txtLName" promptText="Last name" />
                  <TextField fx:id="txtOrigin" promptText="Origin" />
               </children>
            </HBox>
            <HBox alignment="CENTER" prefHeight="100.0" prefWidth="200.0" spacing="5.0">
               <children>
                  <Button mnemonicParsing="false" onAction="#btnInsert" text="Insert Data" />
                  <Button mnemonicParsing="false" onAction="#deleteData" text="Delete Data" />
               </children>
            </HBox>
         </children>
         <padding>
            <Insets bottom="15.0" />
         </padding>
      </VBox>
   </top>
</BorderPane>
TableViewController.java
import javafx.collections.FXCollections;
import javafx.collections.ObservableList;
import javafx.event.ActionEvent;
import javafx.fxml.FXML;
import javafx.fxml.Initializable;
import javafx.scene.control.TableColumn;
import javafx.scene.control.TableView;
import javafx.scene.control.TextField;
import javafx.scene.control.cell.PropertyValueFactory;
import javafx.scene.control.cell.TextFieldTableCell;

import java.net.URL;
import java.util.Arrays;
import java.util.ResourceBundle;

public class TableViewController implements Initializable {

    @FXML
    private TableColumn<Person, String> firstName;

    @FXML
    private TableColumn<Person, String> lastName;

    @FXML
    private TableColumn<Person, String> origin;

    @FXML
    private TableView<Person> table;

    @FXML
    private TextField txtFName;

    @FXML
    private TextField txtLName;

    @FXML
    private TextField txtOrigin;

    ObservableList<Person> initialData(){
        Person p1 = new Person("Sample","Last Sample Name"," US");
        Person p2 = new Person("Test","Last Name"," PH");
        return FXCollections.observableArrayList(p1, p2);
    }

    @FXML
    private void btnInsert(ActionEvent event){

        if(!txtFName.getText().isEmpty() || !txtLName.getText().isEmpty() || !txtOrigin.getText().isEmpty()){
            Person newData = new Person(txtFName.getText(), txtLName.getText(), txtOrigin.getText());
            table.getItems().add(newData);
            txtFName.clear();
            txtLName.clear();
            txtOrigin.clear();
        }else{
            System.out.println("Fields should not be empty.");
        }
    }

    @FXML
    private void deleteData(ActionEvent event){
        TableView.TableViewSelectionModel<Person> selectionModel = table.getSelectionModel();
        if(selectionModel.isEmpty()){
            System.out.println("You need select a data before deleting.");
        }

        ObservableList<Integer> list = selectionModel.getSelectedIndices();
        Integer[] selectedIndices = new Integer[list.size()];
        selectedIndices = list.toArray(selectedIndices);

        Arrays.sort(selectedIndices);

        for(int i = selectedIndices.length - 1; i >= 0; i--){
            selectionModel.clearSelection(selectedIndices[i].intValue());
            table.getItems().remove(selectedIndices[i].intValue());
        }
    }

    @Override
    public void initialize(URL url, ResourceBundle resourceBundle) {
        firstName.setCellValueFactory(new PropertyValueFactory<Person, String>("firstName"));
        lastName.setCellValueFactory(new PropertyValueFactory<Person, String>("lastName"));
        origin.setCellValueFactory(new PropertyValueFactory<Person, String>("origin"));

        table.setItems(initialData());

        editData();
    }

    private void editData(){
        firstName.setCellFactory(TextFieldTableCell.<Person>forTableColumn());
        firstName.setOnEditCommit(event ->{
            Person person = event.getTableView().getItems().get(event.getTablePosition().getRow());
            person.setFirstName(event.getNewValue());
            System.out.println(person.getLastName() + "'s Name was updated to "+ event.getNewValue() +" at row "+ (event.getTablePosition().getRow() + 1));
        });

        lastName.setCellFactory(TextFieldTableCell.<Person>forTableColumn());
        lastName.setOnEditCommit(event ->{
            Person person = event.getTableView().getItems().get(event.getTablePosition().getRow());
            person.setLastName(event.getNewValue());
            System.out.println(person.getFirstName() + "'s Last Name was updated to "+ event.getNewValue() +" at row "+ (event.getTablePosition().getRow() + 1));
        });

        origin.setCellFactory(TextFieldTableCell.<Person>forTableColumn());
        origin.setOnEditCommit(event ->{
            Person person = event.getTableView().getItems().get(event.getTablePosition().getRow());
            person.setOrigin(event.getNewValue());
            System.out.println("Origin was updated to "+ event.getNewValue() +" at row "+ (event.getTablePosition().getRow() + 1));
        });
    }
}
That’s it! You can also copy these codes for Table View in JavaFX and test it! If you want to learn this tutorial Table View in JavaFX via video, you can watch the youtube video below.
YouTube Video