TitledPane in JavaFX is a very cool container to use if you are creating an application something like entering personal information etc. For example, if you are creating an application that deals with privacy, well the JavaFX TitledPane is great to use as it features a collapsible container.
In this tutorial, you will learn how to use the TitlePane in JavaFX and I will walk you through creating this node in JavaFX and show its cool features.
How to use the TitledPane in JavaFX
The TitledPane is a container that can be collapsed and expanded. If you are using the Scene Builder application, you will see the TitledPane implemented in the application. This control or node in JavaFX is very easy to use and create. When the TitledPane is being collapsed, it only shows the title bar and hides its content. Otherwise, it is expanded, and it shows the title bar and its content.
To hide and show the content of the TitledPane is by simply clicking anywhere in the title bar. Now, open your IDE and Scene Builder because in this tutorial we will use the Scene Builder to create the GUI easily, and please go ahead to the given examples below to learn more about the TitledPane in JavaFX.
JavaFX TitledPane Examples
The following examples below will show how to create the TitledPane and show its uses and show how it actually works.
Create the TitledPane
If you prefer to code by creating the TitledPane, the example code below will teach you how to code the TitledPane. Use the default constructor of the node and create an instance of the TitledPane constructor as shown in the code snippet below. Creating the TitledPane using the Scene Builder is very easy, you just simply drag and drop the nodes from the library.
// Create a TitledPane method 1
TitledPane tp = new TitledPane();
tp.setText("This is the title");
tp.setContent(new Button("This is a button"));

// Create a TitledPane method 2
TitledPane tp = new TitledPane("This is the title", new Button("This is a button"));
Note: You can add any layouts or nodes in the method setContent() of the TitledPane.
Add to the Scene graph
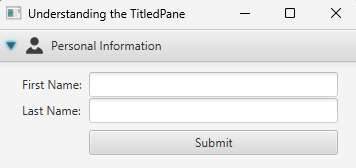
You need to add the TitledPane to the Scene Graph to make it visible to the frontend. To show the node to the scene, you also need to have a layout in JavaFX. If you are familiar with layouts, this is easy for you to make. The example code below shows how to use the layout and add it to the scene together with the titled pane.
// Create the TitledPane
TitledPane tp = new TitledPane("Personal Information", new Button("Button"));
// Create the layout
StackPane layout = new StackPane(tp);
// Create the scene
Scene scene = new Scene(layout, 400, 400);
// Set the scene to stage
stage.setScene(scene);
stage.show();
Output
Basic properties of the TitledPane
The JavaFX TitledPane has the most commonly used method or properties. These are animated, collapsible, and expanded. You can use them easily; each property or parameter of these methods uses a boolean. You can assign true or false to it to work properly.
The animated property works when you click the title bar of the JavaFX TitledPane, When the value of the setAnimated() method is true, it shows an animation when collapsing and expanding the TitledPane. If the value of the method setCollapsible() is true, the TitledPane will be collapsible. Otherwise, it cannot be collapsible.
The TitledPane can be expanded if the property is true. When the value is true, you can expand and collapse the JavaFX TitledPane. The example code below will show you how to use these properties.
TitledPane tp = new TitledPane();

// set animated
tp.setAnimated(true);
// set collapsible
tp.setCollapsible(true);
// set expanded
tp.setExpanded(true);
Output
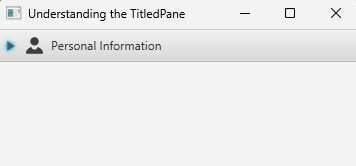
Add a graphic or icon to the TitledPane in JavaFX
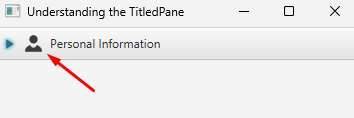
To add an icon to the TitledPane in JavaFX, you need to use the setGraphic() method but before that, you need to instantiate an Image class and create an ImageView. Make sure your icon or image is stored in the resources folder of the project and the following example code below will show you how to add an icon to the JavaFX TitledPane.
Image image = new Image(getClass().getResourcesAsStream("icon.png"));
ImageView iv = new ImageView(image);
TitledPane tp = new TitledPane();
tp.setGraphic(iv);
Output
Styling the TitledPane with CSS
Styling your JavaFX application with CSS is the same as working with CSS on the web. You can use JavaFX CSS to make your JavaFX application more beautiful. The example code below will show you how to customize your JavaFX TitledPane with CSS.
/* #1 */
.titled-pane > .title {
 -fx-background-color: lightgray;
 -fx-alignment: center-right;
}
/* #2 */
.titled-pane > .title > .text {
 -fx-font-size: 14px;
 -fx-underline: true;
}
/* #3 */
.titled-pane > .title > .arrow-button > .arrow {
 -fx-background-color: blue;
}
/* #4 */
.titled-pane > .content {
 -fx-background-color: burlywood;
 -fx-padding: 10;
}


