How to use the ProgressBar in JavaFX
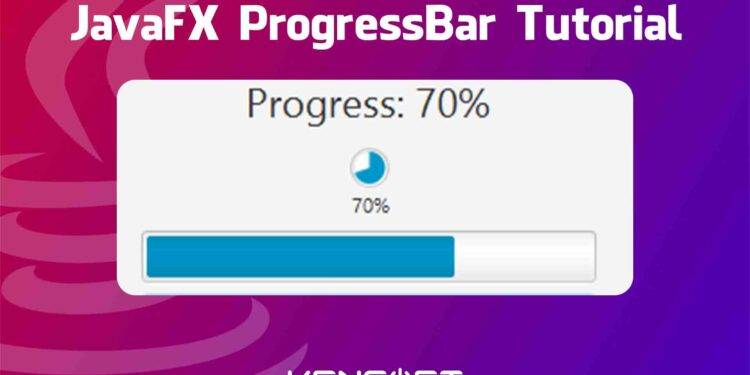
The ProgressBar in JavaFX is very useful for users if you care about impatient users. This control or node is used to give the user visual feedback about the progress of a specific task, something like downloading, loading the application, or transferring a file. If your application does not have a progress bar, it confuses the user.
JavaFX ProgressBar and JavaFX ProgressIndicator work the same, so I will include the ProgressIndicator here in this tutorial. The difference between the two nodes is that the progress Indicator shows a circle progress while the progress bar shows horizontal progress, and there are two types of state or properties in these nodes:
- indeterminate state
- and determinate state.
The indeterminate state works if the system cannot determine the progress of the task and, on the other side, the determinate state can determine the progress of the task and indicates the progress from 0 to 100%. So in this tutorial, you will learn how to use the progress bar in JavaFX and I will walk you through creating the node, adding the node to the scene graph, and show you how to use the progress bar and progress indicator in JavaFX.
JavaFX ProgressBar examples
The first example will be creating the progress bar and other examples to show you and learn more about the progress bar in JavaFX.
Create the Progress bar and Progress indicator
Creating these nodes is very easy. You need to create an instance of its constructor. The following example code below will show you how to create an instance of the progress bar and progress indicator.
// Create an indeterminate state progress indicator and progress bar
ProgressIndicator pi = new ProgressIndicator();
ProgressBar pb = new ProgressBar();

// Create a determinate state progress indicator and progress bar with 70% progress
// Note: the value is a double data type
ProgressIndicator pi = new ProgressIndicator(0.70);
ProgressBar pb = new ProgressBar(0.70);
Add the JavaFX ProgressBar and JavaFX ProgressIndicator to the Scene Graph
Once you created the node manually, meaning you coded to make the progress bar, you need to use the layout in JavaFX. If you are using the Scene Builder you need to use the FXMLLoader class to load the FXML file. The example code below will show you how to add or display the node to the scene graph.
// create a progress bar
ProgressBar pb = new ProgressBar(0);

// Create a button
Button btn = new Button("Make Progress");

// create a layout
VBox layout = new VBox();
layout.getChildren().addAll(pb, btn);

// create the scene
Scene scene = new Scene(layout, 400, 400);
stage.setScene(scene);
stage.show();
Output
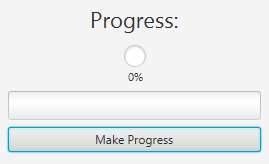
JavaFX Task Progress Bar Example
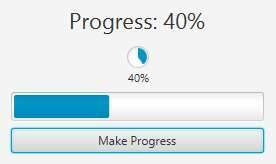
In this example, you will learn how to make progress to the ProgressBar in JavaFX.
import javafx.event.ActionEvent;
import javafx.fxml.FXML;
import javafx.scene.control.Label;
import javafx.scene.control.ProgressBar;
import javafx.scene.control.ProgressIndicator;

public class ProgressController {

    @FXML
    private Label labelProgress;

    @FXML
    private ProgressBar progressBar;

    @FXML
    private ProgressIndicator progressIndicator;

    @FXML
    void makeProgress(ActionEvent event) {
        progress(progressIndicator);
        progress(progressBar);
    }

    private void progress(ProgressIndicator p){
        double value = p.getProgress();
        if(value < 0){
            value = 0.1;
        }else{
            value = value + 0.1;
            if(value >= 1.0){
                value = 1.0;
            }
        }
        p.setProgress(value);
        labelProgress.setText("Progress: " + Integer.toString((int) Math.round(value * 100))+ "%");
    }

}
Output
Styling the node with CSS
JavaFX CSS is almost the same as CSS for web, and it is also easy to use especially if you have a CSS background. In our Progress Bar and Progress Indicator we can apply a style using JavaFX CSS. The following CSS code below will show you the basic styling for the progress bar and progress indicator.
/* This is for progress indicator */
.progress-indicator:indeterminate {
    -fx-progress-color: red;
}
.progress-indicator:determinate {
    -fx-progress-color: blue;
}

/* This is for progress bar */
.progress-bar .track {
 -fx-background-color: lightgray;
 -fx-background-radius: 5;
}
.progress-bar .bar {
 -fx-background-color: blue;
 -fx-background-radius: 5;
}


