Tooltip in JavaFX is very useful when you want to display additional information to the user when they hover over the node from your application. For example, Button, TextField, TextArea, etc.
JavaFX Tooltip shows a pop-up when a user hovers over the nodes. This control is used to show additional information to the user about the node. Suppose your application does have a button that you think is confusing. In that case, you can set a ToolTip to show the additional information to the user to inform that this button is used for saving, removing, or closing the application.
How to show Tooltip in JavaFX
Showing the Tooltip in JavaFX is very easy, you have to instantiate the Tooltip constructor to make the Tooltip. In this tutorial, you will learn how to show Tooltip in JavaFX and I will walk you through creating this control and implementing this in your application. The Tooltip also has several properties to use. Please refer to the list as shown below.
- Text
- Graphic
- contentDisplay
- textAlignment
- textOverrun
- wrapText
- graphicTextGap
- font
- activated
Using the Tooltip, you can also add a graphic or an icon to display in your Tooltip as content besides the Tooltip text, in short, a Tooltip can have text and a graphic or icon. The examples below will show you how to show Tooltip in JavaFX.
JavaFX Tooltip Example
The first example will be creating the Tooltip and to follow the other example I am going to show in this tutorial. Now, we will use the Tooltip class to create a Tooltip. You can use its default constructor or put an initial text. Please refer to the example code below to learn more about creating the Tooltip in JavaFX.
// Create a ToolTip using its default constructor
ToolTip tooltip = new ToolTip();

// Create a ToolTip with text
ToolTip tooltip = new ToolTip("Save the image");
Create a scene with a layout and a node
Before we show the Tooltip to the Scene Graph, first we need to create the layout in JavaFX and add a button and add a Tooltip. Please refer to the example code below to learn more about adding the Tooltip to the Scene Graph.
// create a layout
StackPane layout = new StackPane();
// create a button
Button btn = new Button("Save");
// add the button to the layout
layout.getChildren().add(btn);
// create the scene
Scene scene = new Scene(layout, 200, 200);
stage.setScene(scene);
stage.setTitle("Understanding the ToolTip");
stage.show();
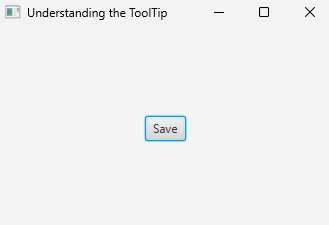
Output
Add the Tooltip to a node
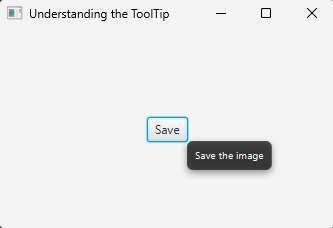
Once you have created the scene, and you already have a node in your application, the next step you are going to do is to create the Tooltip and add it to the node or a button. Please refer to the example code below to learn more.
// create the ToolTip and add it to the node
Tooltip tooltip = new Tooltip();
tooltip.setText("Save the image");
//call the button object
btn.setTooltip(tooltip);

// or you can also use the install() method show the tooltip
Tooltip.install(btn, tooltip);
Output
Add a graphic or icon to the Tooltip
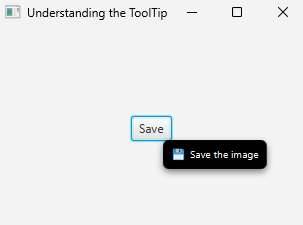
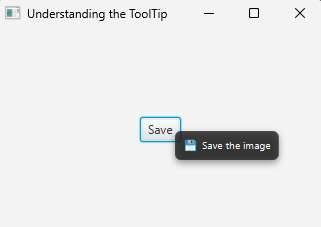
Adding a graphic to the control is a big pro to show better UI. Adding a graphic to the Tooltip is very easy, but you need to have an image file, and you need to use the Image class, you also need the ImageView as a container for the graphic to show in the Tooltip. Please refer to the example code below to learn more about adding a graphic to the Tooltip control.
Image image = new Image(getClass().getResourceAsStream("/img/icon.png"));
ImageView iv = new ImageView(image);
tooltip.setGraphic(iv);
Output
JavaFX Tooltip CSS
In JavaFX, it is allowed to use CSS. JavaFX CSS is very likely similar to CSS on websites. So, applying a style to the Tooltip in JavaFX is very easy, you have two options to do, you can do the inline style or add an external CSS file. In this example, you will see how to add a style to our Tooltip control by changing its background color and its text fill. Please see the example code below to learn more about adding style to a JavaFX application.
Tooltip tooltip = new Tooltip();
tooltip.setText("Save the image");
tooltip.setGraphic(iv);
tooltip.setStyle("-fx-background-color: black;"+"-fx-text-fill: white"); // use the setStyle() method to add an inline style
btn.setTooltip(tooltip);
Output
