SplitPane is one of the most important containers if you need it. In this tutorial, you will learn how to use the JavaFX SplitPane. This container allows you to arrange many nodes horizontally or vertically separated by the JavaFX SplitPane divider. The SplitPane divider can be dragged by the user if they want the other side of the container expanded nor shrink.
How to use the JavaFX SplitPane
SplitPane is very easy to use, maybe some of you have seen the functionality of the so-called SplitPane in JavaFX. If you are using an IDE to develop your application, you can hover over the sidebar of your project and if you see your cursor has changed to resize, that is how the SplitPane works in JavaFX. Creating this container in your JavaFX application is very easy to do because it is almost the same as the layout in JavaFX. Because you can put nodes inside the JavaFX SplitPane.
In this tutorial, I will walk you through creating the SplitPane in JavaFX. You will know how to use the JavaFX SplitPane, add nodes inside, show some important and useful properties of the container, and more examples to show in this tutorial.
JavaFX SplitPane Example
The first step we go through is by creating the SplitPane, we cannot use this container without creating it. There are two easiest ways to create this container: you can use the Scene Builder application to create UI easily in JavaFX and the other easiest way to create the SplitPane is by manually coding it. If you would like to learn more about how to create this container using the Scene Builder, you can do so by watching the YouTube Video below.
Please go ahead below to learn more about how you can create the SplitPane in JavaFX using its default constructor from the SplitPane class.
// create the splitpane using its default constructor.
SplitPane splitPane = new SplitPane();
Add the SplitPane to the scene graph
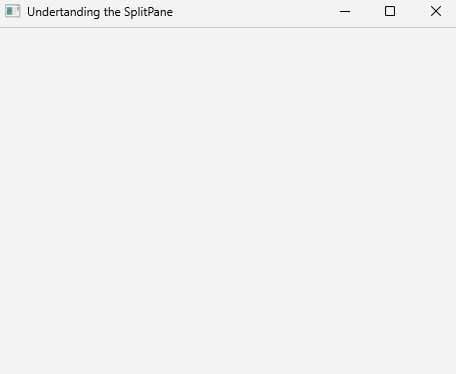
Usually, if we are developing our application in JavaFX, you must have to know how to the JavaFX Layout. This is the most important part to show our nodes to the scene. You need to add the SplitPane to the layout if you want your SplitPane to be shown in your application if you run it. The following example code below will show you how to add the SplitPane to your JavaFX application.
// create the SplitPane
SplitPane splitPane = new SplitPane();
// create the layout
StackPane layout = new StackPane(splitPane);
// create the scene
Scene scene = new Scene(layout, 500, 500);// 500 is the scene size
// set the scene to the stage by calling the stage object
stage.setScene(scene);
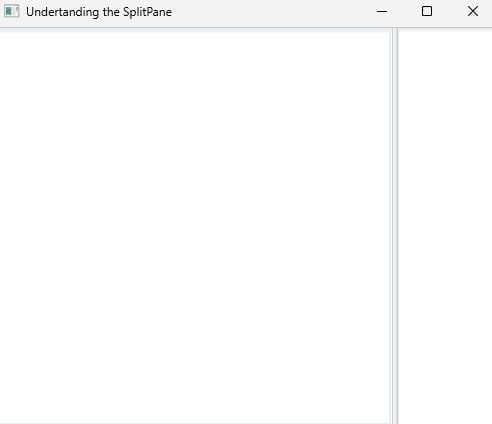
stage.setTitle("Understanding the SplitPane");
stage.show();
Output
Adding nodes to the SplitPane
Referring to the previous example, you created an empty SplitPane. In this example, you will learn how to add nodes in the container by using the SplitPane getItems() method. The following example below will show you how to add nodes to the SplitPane.
// create two textArea
TextArea t1 = new TextArea();
TextArea t2 = new TextArea();
// create the splitpane
SplitPane splitPane = new SplitPane();
// add nodes
splitPane.getItems().addAll(t1, t2);
Output
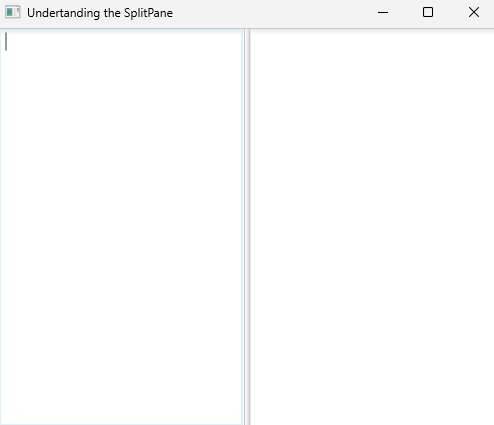
Setting the JavaFX SplitPane orientation
The default orientation of the SplitPane is horizontal. This means you can drag the divider from left to right. Please see the example code below to learn more about setting its orientation.
SplitPane splitPane = new SplitPane();
splitPane.setOrientation(Orientation.VERTICAL);
Output
Setting the divider position
You can also set the divider position and the default position at the center, but you will use the Double data type to set the position from 0 to 1 and the default is 0.5. Please see the following example code below to learn more.
SplitPane splitPane = new SplitPane();
splitPane.setDividerPosition(0, 0.8); // 0 is the index and 0.8 is the position
Output
Adding CSS to the SplitPane
In the JavaFX framework, you can add JavaFX CSS to your application. In this example, you will know the basic CSS properties of the JavaFX SplitPane. The following example code below is the JavaFX SplitPane CSS properties.
.split-pane > .split-pane-divider {
 -fx-background-color: blue;
}
.split-pane:horizontal > .split-pane-divider {
 -fx-pref-width: 5;
}
.split-pane:vertical > .split-pane-divider {
 -fx-pref-height: 5;
}
YouTube Video