Slider in JavaFX is the best way to use it if you want to select a numeric value from a number range by sliding the slider knob. In this tutorial, you will know how to use the slider in JavaFX. You need to set the minimum and maximum value of the slider when using it, and you have to use the double data type for its value.
How to use the slider in JavaFX
The JavaFX slider is very easy to use when you want your users to select a numeric value from a number range by just sliding it. You can simply drag or slide the slider knob or thumb to change a wanted value. Creating the slider in JavaFX is also very easy to do; we will use its constructor and instantiate it.
In this tutorial, I will walk you through how to use the slider in JavaFX. I will show you how to create, show it to the application window, and show you some really useful properties of the JavaFX slider.
Slider has major and minor tick marks which show lines of the User Interface of slider in JavaFX, and it indicates the location of values where the user’s selected numeric range. I will show an example of that later. Now, the following example below will show you how to create the slider in JavaFX.
Creating the Slider
As mentioned above, creating the slider is very easy. There are two options for you to create this node in JavaFX. You can either use the scene builder application or code it manually. If you want to use the scene builder, please go ahead to the YouTube video below to learn more because this example will show you codes on how you can create the slider.
Slider has two constructors to use when creating this node, there is a default constructor where you can create the slider by default and the other is a parameterized constructor which you can pass values to the constructor to specify its minimum, maximum and current value. Please go ahead to the example code below to learn more about how to create it.
// using the default constructor
Slider slider = new Slider();

// using the parameterized constructor
Slider slider = new Slider(0.0, 100.0, 10.0);
Add the slider to the scene graph
In this example you cannot see the slider if you don’t do this part. Adding the slider to the scene graph is pretty simple, you just need to use the layout in JavaFX. You can use any layout in JavaFX like StackPane, AnchorPane, etc. Please go ahead to the example code below to learn more about how to add the slider to the scene.
// create the slider
Slider slider = new Slider(0.0, 100.0, 0.0);

// create the layout
StackPane layout = new StackPane(slider);
//create the scene
Scene scene = new Scene(layout, 500, 500); // 500 is the scene size
// call the stage to set the scene
stage.setScene(scene);
stage.setTitle("Understanding the slider");
stage.show();
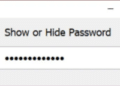
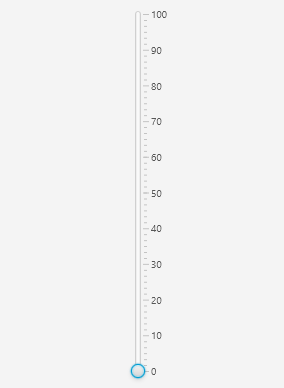
Output
Setting values of the slider
Setting values of the slider in JavaFX is also important. If you wonder what values are in the parameterized constructor, those are called initial values. In this example, we will use the setters of the slider to set the values we need. We can set the minimum and maximum value range of the slider, and we can also set the knob or thumb value of the slider by calling the setValue() method. Once you are familiar with it, not only are these methods or properties you can set, there are a lot of properties in JavaFX Slider you can too.
// setting values
slider.setMin(0.0);
slider.setMax(100.0);
slier.setValue(5.0);
Getting the selected value from the slider
Most of the time when we have nodes in our JavaFX application, we need to do an action and get the value from the action performed. In this JavaFX slider example, we need to use the Slider valueProperty() method and also addListener() method to get the value. Please go ahead below and see how to get the selected value from the slider.
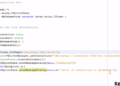
slider.valueProperty().addListener((ObservableValue<? extends Number> num, Number oldVal, Number newVal)->{
    float value = Float.parseFloat(String.format("%.1f",newVal));

    if(value <= 37.2){
        temp.setText("Body Temperature: "+value+"\n"+"Normal Body Temperature");
    }else if(value >= 37.3){
        temp.setText("Body Temperature: "+value+"\n"+"You have a fever");
    }
});
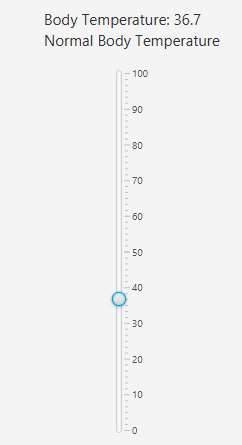
The temp is an object of a JavaFX Label.
Output
Commonly used properties in JavaFX Slider
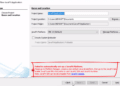
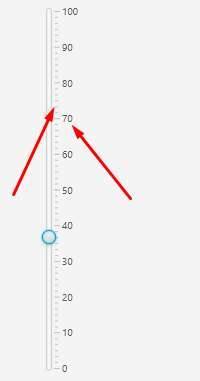
These properties are the most commonly used properties in the slider because they are useful to the user’s end to show the tick marks and the label. As mentioned above, tick marks are the lines that specify the distance. The tick labels are also the numbers as shown in the major ticks. The example code below shows how to show and hide these properties in the slider in JavaFX.
slider.setShowTickLabels(true);
slider.setShowTickMarks(true);
Set the boolean value to false if you want to hide the tick marks and labels.
Output
Snap to ticks
This property is one of the most commonly used properties in the slider in JavaFX. If you enable this property, you will see a magnetic effect when you drag the thumb or the slider knob. Please see the example code below to learn more about how to enable this feature in your JavaFX slider.
slider.setSnapToTicks(true); // set to false if you want to disable this
Styling the Slider with CSS
JavaFX CSS is very useful to make your JavaFX application looks great. The slider has these CSS properties as shown below.
- -fx-orientation
- -fx-show-tick-labels
- -fx-show-tick-marks
- -fx-major-tick-unit
- -fx-minor-tick-count
- -fx-show-tick-labels
- -fx-snap-to-ticks
- -fx-block-increment
Slider also supports CSS pseudo-classes. Check the substructures below that can be styled.
- axis
- track
- thumb
.slider > .axis {
 -fx-tick-label-fill: blue;
 -fx-tick-length: 15px;
 -fx-minor-tick-length: 5px
}
.slider > .axis > .axis-tick-mark {
 -fx-stroke: red;
}
.slider > .axis > .axis-minor-tick-mark {
 -fx-stroke: green;
}

.slider > .track {
 -fx-background-color: red;
}

.slider .thumb {
 -fx-background-radius: 0;
}

.slider .thumb {
 -fx-background-image: url("thumb.jpg");
}

/* An inverted triangle */
.slider > .thumb {
 -fx-shape: "M0, 0L10, 0L5, 10 Z";
}
/* A triangle pointing to the right*/
.slider:vertical > .thumb {
 -fx-shape: "M0, 0L10, 5L0, 10 Z";
}

/* An inverted triangle below a rectangle*/
.slider > .thumb {
 -fx-shape: "M0, 0L10, 0L10, 5L5, 10L0, 5 Z";
}
/* A triangle pointing to the right by the right side of a rectangle */
.slider:vertical > .thumb {
 -fx-shape: "M0, 0L5, 0L10, 5L5, 10L0, 10 Z";
}
YouTube Video