JavaFX Tutorial
JavaFX Effects offers a wide variety of effects for creating visually appealing UI elements. Some developers are used to put extra eye catching UI to make their application visually appealing. Visually appealing applications are one of the most important factors in keeping users interested and loving it.
This article explains how to apply basic effects to your JavaFX application to make it more appealing. In JavaFX, we will go over some useful effects as well as others. Continue reading to find out more.
How to apply the JavaFX Effects
The good thing here is we can apply any effects to any Node on the SceneGraph using the setEffect() method. To apply the effect in JavaFX, use the setEffect() method, like this one setEffect(shadow), but first you must instantiate a respective class representing the effect to be applied in the Node. This is how you instantiate an effect DropShadow shadow = new DropShadow().
Set the properties of the effect
After you’ve instantiated the effect, you’ll need to use its setter method to configure its properties. This is how you set the properties of the effect as shown in the code block below.
// Setting the properties of the effect
shadow.setColor(Color.DARKGRAY);
Applying the effect to the node
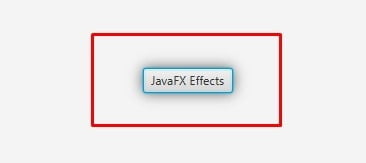
Once you’ve finished configuring the effect’s properties. You can now use the setEffect() method to apply the desired effect to the node. As shown in the code block below, this is how to apply an effect to a node. Let’s assume that we have a button to apply an effect.
// Applying the effect to the Node
button.setEffect(shadow);
Output
Effect in JavaFX
The following topics gives you descriptions and examples. Continue reading to learn more about JavaFX Effects.
| Type of Effect | Description |
| Blend | A blending effect that combines two inputs together |
| Bloom | An effect that makes brighter portions of the input image appear to glow |
| Box blur | A blur effect using a simple box filter kernel to make it unclear |
| Color Adjust | An effect that allows the adjustments of hue, saturation, brightness, and contrast |
| Color Input | An effect that gives you the same output that renders a rectangular region that is filled with the given color |
| Displacement map | An effect that gives you the illusion of floating |
| Drop Shadow | An effect that gives you a shadow effect behind the node |
| Gaussian Blur | An effect similar to box blur that makes things unclear and uses a Gaussian convolution kernel |
| Glow | An image that glows as a result of this effect |
| Image Input | An effect that embeds an image just like Color Input that input to another effect |
| Inner Shadow | An effect similar to Drop Shadow that gives you a shadow inside the edges of the node |
| Lighting | An effect that gives light shining on the given node |
| Motion Blur | An effect similar to Gaussian blur with configurable radius and angle |
| Perspective Transform | An effect that is mostly used in Three-dimensional effect. It provides non-affine transformation of the input content |
| Reflection | An effect shows the reflected version of the node |
| Sepia Tone | It is an effect that is similar to old photographs |
| Shadow | This effect creates a duplicate of the node blurry edges |
Blend
Blend is a type of effect in JavaFX. Blending is a way to merging two different nodes. We’ll use an image input and a text to demonstrate a blend. By combining the two, we’ll be able to fill the text with an image. There will be a beautiful clipping effect as a result. Go ahead and follow the code example below.
Example: Blend Effect
Image image = new Image("https://kensoftph.com/wp-content/uploads/2021/09/java-quiz-3.jpg", 400, 400, true, true);
ImageInput ii = new ImageInput(image, 0, 0);

Blend blend = new Blend();
blend.setMode(BlendMode.SRC_ATOP);
blend.setTopInput(ii);

Text text = new Text(0, 80, "KENSOFT");
text.setFont(Font.font("Verdana", FontWeight.BOLD, 80));
text.setEffect(blend);

primaryStage.setTitle("JavaFX Effects Tutorial");
primaryStage.setScene(new Scene(new StackPane(text), 400, 400));
primaryStage.show();
Output

Bloom
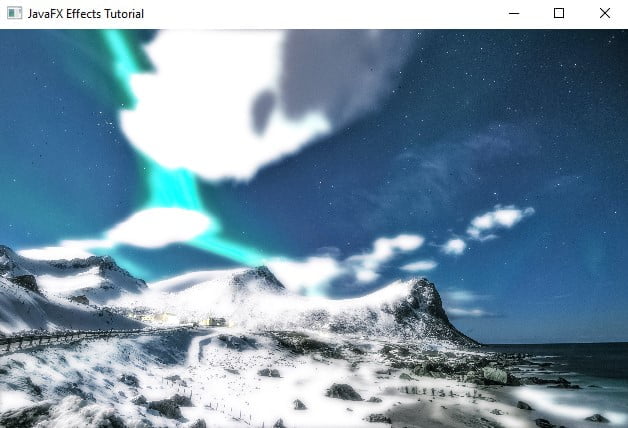
Bloom is a JavaFX effect that creates a glowing effect similar to the Glow effect. We will use an image to demonstrate a bloom effect in JavaFX. To create a glowing effect using the bloom effect, you will need to use the setThreshold()method. The range of the threshold value is 0.0 to 1.0. To do that, check out the code example below and make your own bloom effect.
Example: Bloom Effect
StackPane root = new StackPane();
Scene scene = new Scene(root, 400,400);

Bloom bloom = new Bloom();
bloom.setThreshold(0.5);

Image image = new Image(getClass().getResourceAsStream("/javafx/effects/nature.jpg"));
ImageView iv = new ImageView(image);
iv.setPreserveRatio(true);
iv.setSmooth(true);
iv.setFitHeight(400);
iv.setEffect(bloom);
root.getChildren().add(iv);

primaryStage.setTitle("JavaFX Effects Tutorial");
primaryStage.setScene(scene);
primaryStage.show();
Output
Box blur
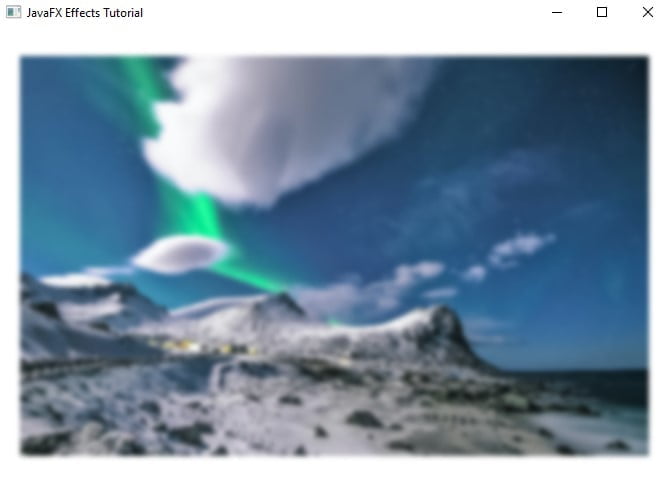
Box blur is a type of effect in JavaFX, Box blur is used to blur a node. It means becoming unclear. The box blur effect has four different types of properties.The height, width, input, and iterations.
- Height – The height is a double type value that represents the vertical size of the effect.
- Width – The width is a double type value that represents the horizontal size of the effect.
- Input – A property that represents an input of the box blur effect.
- Iterations – This property is an integer type value that helps improve its quality and smoothness.
Example: Box blur Effect
StackPane root = new StackPane();
Scene scene = new Scene(root, 400,400);

BoxBlur bb = new BoxBlur();
bb.setHeight(5);
bb.setWidth(5);
bb.setIterations(3);

Image image = new Image(getClass().getResourceAsStream("/javafx/effects/nature.jpg"));
ImageView iv = new ImageView(image);
iv.setPreserveRatio(true);
iv.setSmooth(true);
iv.setFitHeight(400);
iv.setEffect(bb);
root.getChildren().add(iv);

primaryStage.setTitle("JavaFX Effects Tutorial");
primaryStage.setScene(scene);
primaryStage.show();
Output
Color Adjust
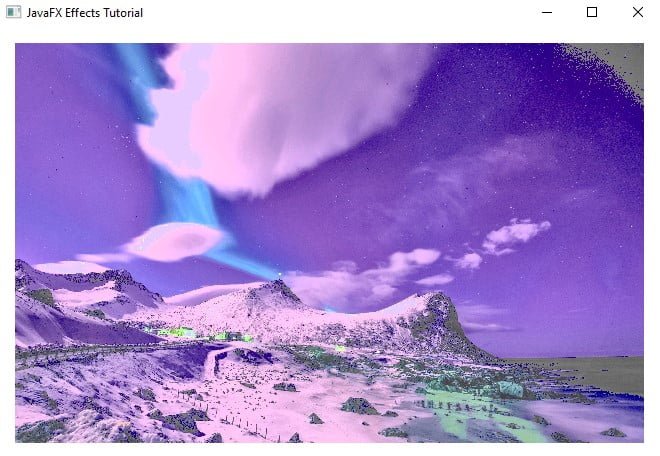
Color Adjust is a type of effect in JavaFX. Color adjust is used to change the color of an image. By using the Color Adjust effect, you can adjust the hue, saturation, brightness, and contrast of your image. In the example below, we’ll modify the hue, saturation, brightness, and contrast of an image. Take a look at the example code below.
Example: Color Adjust Effect
StackPane root = new StackPane();
Scene scene = new Scene(root, 400,400);

ColorAdjust ca = new ColorAdjust();
ca.setBrightness(0.5);
ca.setContrast(0.3);
ca.setHue(0.3);
ca.setSaturation(0.4);

Image image = new Image(getClass().getResourceAsStream("/javafx/effects/nature.jpg"));
ImageView iv = new ImageView(image);
iv.setPreserveRatio(true);
iv.setSmooth(true);
iv.setFitHeight(400);
iv.setEffect(ca);
root.getChildren().add(iv);

primaryStage.setTitle("JavaFX Effects Tutorial");
primaryStage.setScene(scene);
primaryStage.show();
Output
Color Input
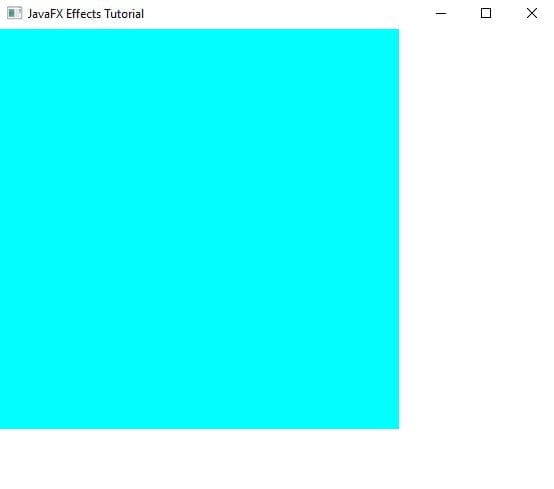
Color input is type of effect in JavaFX, Color input gives you the same output as rectangle but it is not a rectangle (not a node). It is mostly used to pass as an input for other effects. Take a look at the example code below.
Example: Color Input Effect
ColorInput ci = new ColorInput();
ci.setHeight(400);
ci.setWidth(400);
ci.setPaint(Color.AQUA);


Rectangle rect = new Rectangle();
rect.setEffect(ci);

Group group = new Group(rect);
Scene scene = new Scene(group, 400,400);
primaryStage.setTitle("JavaFX Effects Tutorial");
primaryStage.setScene(scene);
primaryStage.show();
Output
Displacement Map
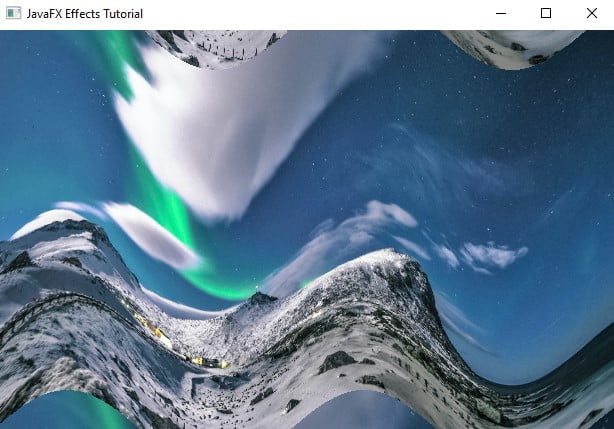
It is one of the coolest effect. Displacement Map is used to transform images or something like floating. To set up the displacement map in JavaFX. You need to add coordinate correction data for each pixel using the FloatMap helper class. Please take a look at the example code below on how to set up the displacement map in JavaFX.
Example: Displacement Map effect
StackPane root = new StackPane();
Scene scene = new Scene(root, 400, 400);

FloatMap floatMap = new FloatMap();
floatMap.setWidth(400);
floatMap.setHeight(400);
for (int x = 0; x < 400; x++) {
    double v = Math.sin(x / 30.) / 10.;
    for (int y = 0; y < 400; y++) {
        floatMap.setSamples(x, y, 0.0f, (float) v);
    }
}
DisplacementMap displacementMap = new DisplacementMap();
displacementMap.setWrap(true);
displacementMap.setMapData(floatMap);

Image image = new Image(getClass().getResourceAsStream("/javafx/effects/nature.jpg"));
ImageView iv = new ImageView(image);
iv.setPreserveRatio(true);
iv.setSmooth(true);
iv.setFitHeight(400);
iv.setEffect(displacementMap);
root.getChildren().add(iv);

primaryStage.setTitle("JavaFX Effects Tutorial");
primaryStage.setScene(scene);
primaryStage.show();
Output
Drop Shadow
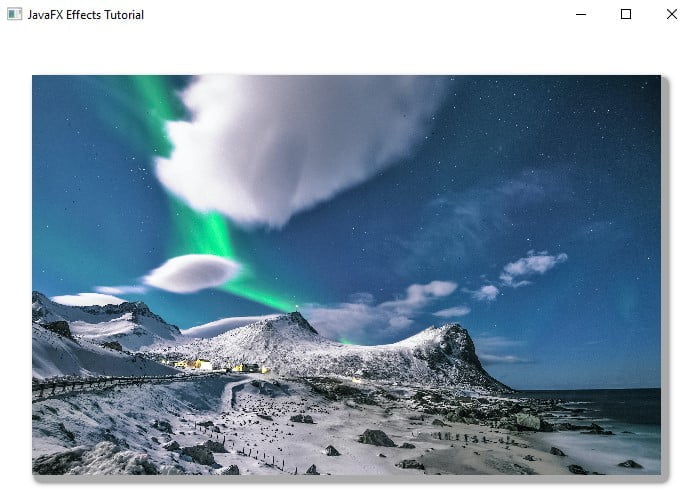
An effect that gives you a shadow effect behind the node. Applying the shadow effect is pretty easy, before we go over at the demonstration. Drop shadow has different types of properties. The following are the properties of the Drop Shadow effect. Color, Blur Type, Radius, Width, Height, Input, Spread, OffsetX, OffsetY. Take a look at the given example below.
Example: Drop Shadow Effect
StackPane root = new StackPane();
Scene scene = new Scene(root, 400, 400);

DropShadow dropShadow = new DropShadow();
dropShadow.setBlurType(BlurType.GAUSSIAN);
dropShadow.setColor(Color.DARKGRAY);
dropShadow.setOffsetX(5);
dropShadow.setOffsetY(5);
dropShadow.setRadius(10);
dropShadow.setSpread(0.8);

Image image = new Image(getClass().getResourceAsStream("/javafx/effects/nature.jpg"));
ImageView iv = new ImageView(image);
iv.setPreserveRatio(true);
iv.setSmooth(true);
iv.setFitHeight(400);
iv.setEffect(dropShadow);
root.getChildren().add(iv);

primaryStage.setTitle("JavaFX Effects Tutorial");
primaryStage.setScene(scene);
primaryStage.show();
Output
Gaussian blur
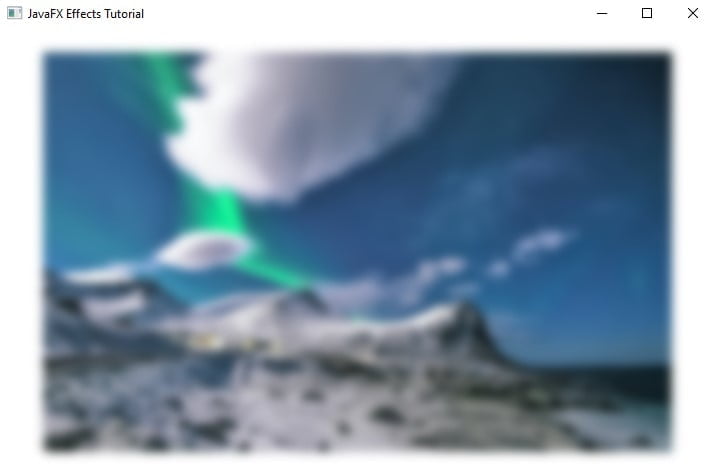
Gaussian blur is used to blur a node. Gaussian blur is similar to Box blur that make nodes unclear. The difference is the Gaussian Blur uses Gaussian convolution kernel which is use to produce blurring effect. The Gaussian blur contains properties:
- Input – This is used to represents an input to the blur effect
- Radius – It is a double type value and representing the radius is to be applied.
Example: Gaussian blur Effect
StackPane root = new StackPane();
Scene scene = new Scene(root, 400, 400);

GaussianBlur gb = new GaussianBlur();
gb.setRadius(15);

Image image = new Image(getClass().getResourceAsStream("/javafx/effects/nature.jpg"));
ImageView iv = new ImageView(image);
iv.setPreserveRatio(true);
iv.setSmooth(true);
iv.setFitHeight(400);
iv.setEffect(gb);
root.getChildren().add(iv);

primaryStage.setTitle("JavaFX Effects Tutorial");
primaryStage.setScene(scene);
primaryStage.show();
Output
Glow
Glow is a type of effect in JavaFX. Just like Bloom, it makes the given input image to glow. So, in our example just like Bloom, we will use an image to demonstrate to glow effect. The most important property in the glow effect is the Level. The level controls the intensity of the glow. The maximum value of the level is 1.0, it uses double type value. To make the glow effect in your JavaFx application, take a look at the example code below.
Example: Glow Effect
StackPane root = new StackPane();
Scene scene = new Scene(root, 400, 400);

Glow glow = new Glow();
glow.setLevel(1.0);

Image image = new Image(getClass().getResourceAsStream("/javafx/effects/nature.jpg"));
ImageView iv = new ImageView(image);
iv.setPreserveRatio(true);
iv.setSmooth(true);
iv.setFitHeight(400);
iv.setEffect(glow);
root.getChildren().add(iv);

primaryStage.setTitle("JavaFX Effects Tutorial");
primaryStage.setScene(scene);
primaryStage.show();
Output
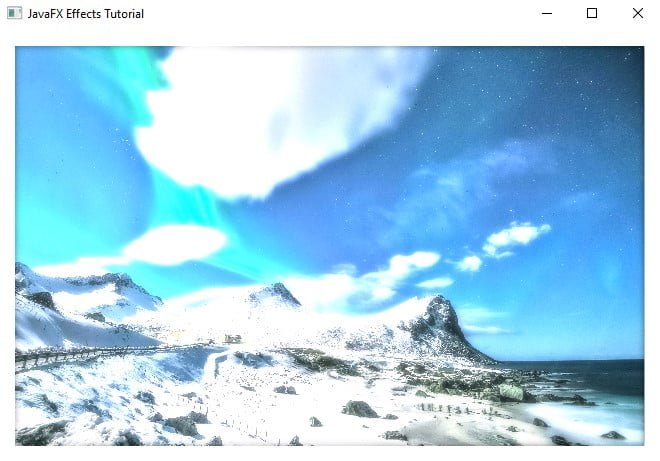
Image Input
Just like Color Input, Image input just embeds an image into your JavaFX application. Image input is a method of passing an image to another effect. The Blend effect has already demonstrated the Image input. To help you understand Image Input, I will show you what the correct meaning inside its paramater looks like. ImageInput ii = new ImageInput(image, 0, 0); The first parameter is the image’s source, while the other two are the image’s x and y coordinates.
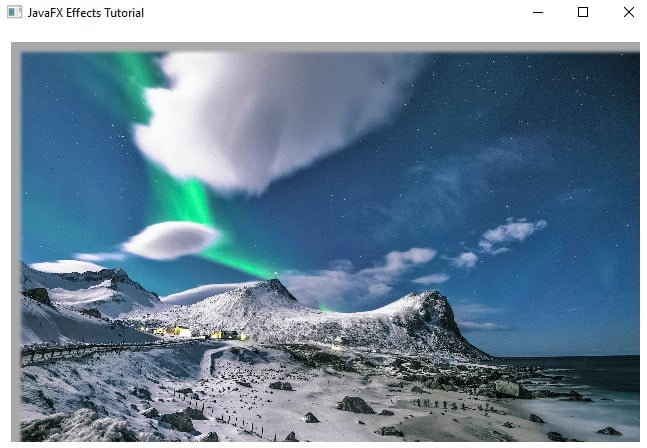
Inner Shadow
Inner Shadow is a type of JavaFX effects that is similar to drop shadow, however the difference is that the inner shadow is created inside the node’s edges. Inner shadow has different types of properties. The following are the properties of the Inner Shadow effect. Color, Blur Type, Radius, Width, Height, Input, Spread, OffsetX, OffsetY,and Choke. Take a look at the given example below.
Example: Inner Shadow Effect
StackPane root = new StackPane();
Scene scene = new Scene(root, 400, 400);

InnerShadow is = new InnerShadow();
is.setBlurType(BlurType.GAUSSIAN);
is.setColor(Color.DARKGRAY);
is.setOffsetX(10);
is.setOffsetY(10);
is.setRadius(5);

Image image = new Image(getClass().getResourceAsStream("/javafx/effects/nature.jpg"));
ImageView iv = new ImageView(image);
iv.setPreserveRatio(true);
iv.setSmooth(true);
iv.setFitHeight(400);
iv.setEffect(is);
root.getChildren().add(iv);

primaryStage.setTitle("JavaFX Effects Tutorial");
primaryStage.setScene(scene);
primaryStage.show();
Output
Lighting
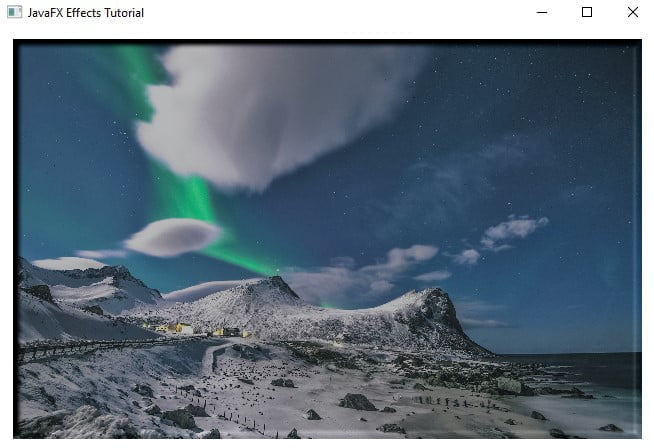
Lighting is also a type of effect in JavaFX. Lighting is used to create a light effect, and there are three types of light sources used in lighting effects. These are the point, distant, and spot. The following example demonstrating the lighting effect with an image. In this example we are applying the effect with its light source. Take a look at the given example code below.
Example: Lighting Effect
StackPane root = new StackPane();
Scene scene = new Scene(root, 400, 400);

Light.Distant light = new Light.Distant();
// Azimuth is the angle of the light in degrees
light.setAzimuth(45);

Lighting lighting = new Lighting();
lighting.setLight(light);
lighting.setSurfaceScale(10);

Image image = new Image(getClass().getResourceAsStream("/javafx/effects/nature.jpg"));
ImageView iv = new ImageView(image);
iv.setPreserveRatio(true);
iv.setSmooth(true);
iv.setFitHeight(400);
iv.setEffect(lighting);
root.getChildren().add(iv);

primaryStage.setTitle("JavaFX Effects Tutorial");
primaryStage.setScene(scene);
primaryStage.show();
Output
Motion blur
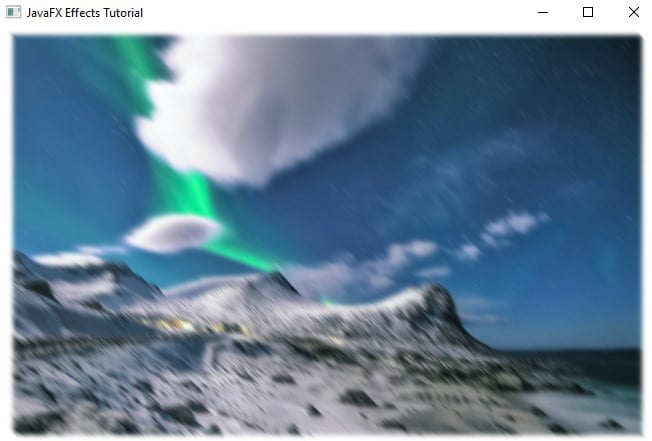
Motion blur is similar to Gaussian blur effect. Motion blur is used to blur a node that make nodes unclear. The only difference is the Motion blur has the angle properties that you can apply and modify. To apply the motion blur into your JavaFX application is very easy and simple to do. Take a look at the given example code below.
- Input – This is used to represents an input to the blur effect
- Radius – It is a double type value and representing the radius is to be applied.
- Angle – This type of property represents the angle of the motion blur effect in degrees.
Example: Motion blur Effect
StackPane root = new StackPane();
Scene scene = new Scene(root, 400, 400);

MotionBlur mb = new MotionBlur();
mb.setRadius(10);
mb.setAngle(45);

Image image = new Image(getClass().getResourceAsStream("/javafx/effects/nature.jpg"));
ImageView iv = new ImageView(image);
iv.setPreserveRatio(true);
iv.setSmooth(true);
iv.setFitHeight(400);
iv.setEffect(mb);
root.getChildren().add(iv);

primaryStage.setTitle("JavaFX Effects Tutorial");
primaryStage.setScene(scene);
primaryStage.show();
Output
Perspective Transform
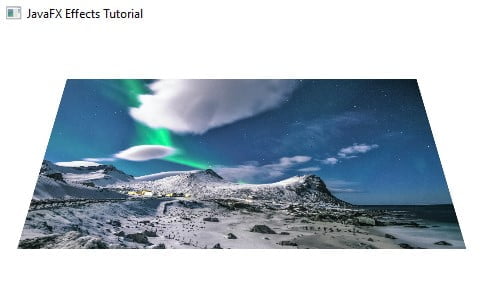
Perspective Transform is another effect which tries to look like 3D. The Perspective Transform changes the node’s dimension to a Three-dimensional look. In order to achieve the perspective transform effect. The eight coordinates must be set, four from the upper part and four from the lower part. Take a look at the given example code below.
Example: Perspective Transform Effect
StackPane root = new StackPane();
Scene scene = new Scene(root, 400, 400);

PerspectiveTransform pt = new PerspectiveTransform();
pt.setUlx(50); // upper-left
pt.setUly(50);

pt.setUrx(400); // upper-right
pt.setUry(50);

pt.setLlx(0); // lower-left
pt.setLly(220);

pt.setLrx(450); // lower-right
pt.setLry(220);

Image image = new Image(getClass().getResourceAsStream("/javafx/effects/nature.jpg"));
ImageView iv = new ImageView(image);
iv.setPreserveRatio(true);
iv.setSmooth(true);
iv.setFitHeight(400);
iv.setEffect(pt);
root.getChildren().add(iv);

primaryStage.setTitle("JavaFX Effects Tutorial");
primaryStage.setScene(scene);
primaryStage.show();
Output
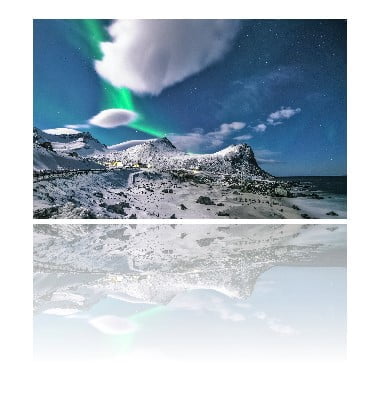
Reflection
Reflection is like a mirror it reflects the node. The reflection effect is added at the bottom of the node. You can also change the properties of the reflection. To change its properties, you can use the topOpacity, bottomOpacity, input, topOffset, and fraction. To achieve the reflection effect into your JavaFX application. Take a look at the given example below.
Example: Reflection Effect
StackPane root = new StackPane();
Scene scene = new Scene(root, 400, 400);

Reflection reflection = new Reflection();
reflection.setTopOpacity(0.5);
reflection.setBottomOpacity(0.0);
reflection.setFraction(0.7);
reflection.setTopOffset(5);

Image image = new Image(getClass().getResourceAsStream("/javafx/effects/nature.jpg"));
ImageView iv = new ImageView(image);
iv.setPreserveRatio(true);
iv.setSmooth(true);
iv.setFitHeight(200);
iv.setEffect(reflection);
root.getChildren().add(iv);

primaryStage.setTitle("JavaFX Effects Tutorial");
primaryStage.setScene(scene);
primaryStage.show();
Output
Sepia tone
Sepia tone is a type of effect in JavaFX. This effects gives a reddish-brown tone to make it look like an old photo. To achieve the sepia effect, we need to set the level property. The value of the property is a double type it ranges from 0.0 to 1.0. Take a look at the example code below.
Example: Sepia tone Effect
StackPane root = new StackPane();
Scene scene = new Scene(root, 400, 400);

SepiaTone sepia = new SepiaTone();
sepia.setLevel(1.0);

Image image = new Image(getClass().getResourceAsStream("/javafx/effects/nature.jpg"));
ImageView iv = new ImageView(image);
iv.setPreserveRatio(true);
iv.setSmooth(true);
iv.setFitHeight(400);
iv.setEffect(sepia);
root.getChildren().add(iv);

primaryStage.setTitle("JavaFX Effects Tutorial");
primaryStage.setScene(scene);
primaryStage.show();
Output

Shadow
JavaFX Effects, a shadow effect that creates a duplicate of a specified node with blurry edges. Shadow effect has different types of properties, it is similar to the drop shadow. The following are the types of properties of the shadow effect. Color, Blur Type, Radius, Width, Height, Input, Spread, OffsetX, OffsetY. Take a look at the given example below.
Example: Shadow Effect
StackPane root = new StackPane();
Scene scene = new Scene(root, 400, 400);

Shadow shadow = new Shadow();

Image image = new Image(getClass().getResourceAsStream("/javafx/effects/nature.jpg"));
ImageView iv = new ImageView(image);
iv.setPreserveRatio(true);
iv.setSmooth(true);
iv.setFitHeight(400);
iv.setEffect(shadow);
root.getChildren().add(iv);

primaryStage.setTitle("JavaFX Effects Tutorial");
primaryStage.setScene(scene);
primaryStage.show();
Output
