How to Play Sound in Java: A Beginner’s Guide
Java offers built-in capabilities to handle audio playback–a feature that enhances your application’s interactivity. In this guide, you’ll learn how to play audio in Java, making your project more engaging.
Why Add Audio to Your Java Application?
Adding sound to your application isn’t just about entertainment. Sounds can:
- Improve user experience by providing auditory feedback.
- Alert users for important notifications.
- Create immersive applications like games or interactive learning tools.
Requirements
Before diving into the implementation, ensure you have:
- Java Development Kit (JDK) installed on your system.
- A
.wavaudio file you want to play. Java supports.wavnatively for simplicity.
Getting Started with Java GUI and Sound
Combining a Graphical User Interface (GUI) with sound playback enriches user interaction. Let’s break the process into clear steps.
Step 1: Creating a GUI
Follow these instructions to set up a basic Java GUI using Swing.
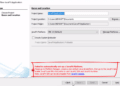
- Set Up the JFrame Form
- Open your Java IDE and create a new JFrame.
- Change the layout of your JFrame to
Null Layout.
- Add Components
- Insert a
JPanelfrom the palette. Resize it to fill the JFrame and customize its background color. - Add another
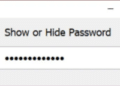
JPanelfor the application header. - Include two
JLabels. One will act as the header’s title, and the other can be used as a clickable button or indicator.
- Insert a
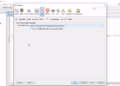
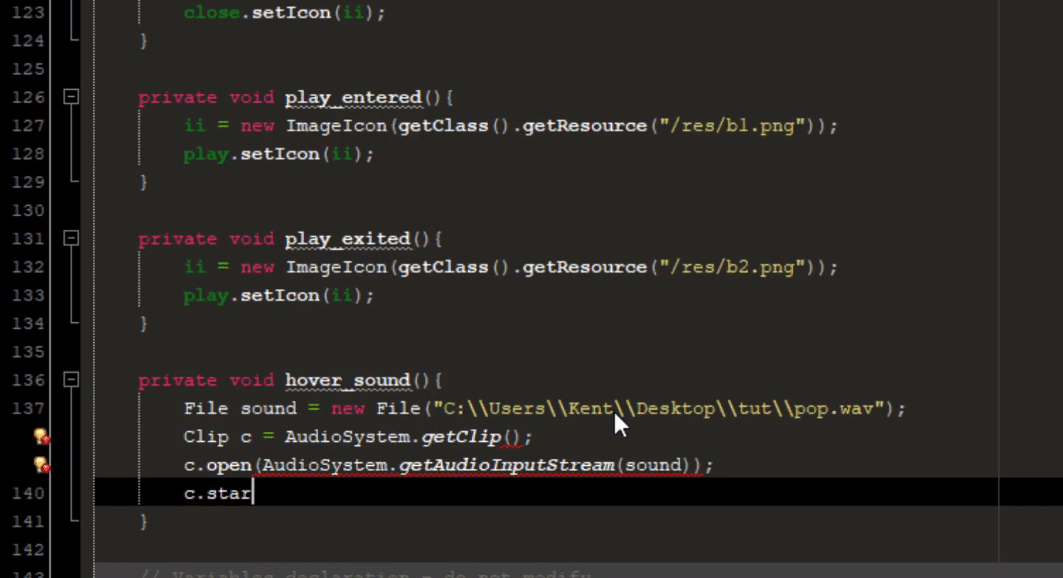
Step 2: Playing a Sound File in Java
Here’s the code to play .wav files in Java:
java
import java.io.File;
import javax.sound.sampled.AudioSystem;
import javax.sound.sampled.Clip;

public class SoundPlayer {
    public static void main(String[] args) {
        try {
            // Set the path to your WAV file
            File wavFile = new File("C:\\Sound\\sample.wav");

            // Load the audio clip
            Clip clip = AudioSystem.getClip();
            clip.open(AudioSystem.getAudioInputStream(wavFile));

            // Play the sound
            clip.start();

            // Optional: Add a delay to allow audio play
            Thread.sleep(clip.getMicrosecondLength() / 1000);
        } catch (Exception e) {
            e.printStackTrace();
        }
    }
}
Step 3: Understanding the Code
- Clip: A specialized line for audio playback that loads the audio data before playing it.
- AudioSystem: Java’s core class to fetch audio resources.
- File: The Java class used to locate the
.wav
Tips for Optimizing Audio Playback
- Ensure Compatibility: Test if your
.wav - Try Looping the Audio: If your application needs background music, use the
loop()1clip.loop(Clip.LOOP_CONTINUOUSLY); - Handle Errors Gracefully: Use
try-catchblocks to log issues with audio playback.
Practical Use Case: Adding Audio Playback Button in GUI
Here’s how to integrate sound playback with a JButton:
java
import javax.swing.*;
import java.awt.event.*;
import java.io.File;
import javax.sound.sampled.AudioSystem;
import javax.sound.sampled.Clip;

public class AudioButtonApp {
    public static void main(String[] args) {
        JFrame frame = new JFrame("Audio Button");
        JButton playButton = new JButton("Play Sound");

        playButton.setBounds(50, 50, 200, 50);

        // Action listener for button click
        playButton.addActionListener(new ActionListener() {
            public void actionPerformed(ActionEvent e) {
                try {
                    File wavFile = new File("C:\\Sound\\sample.wav");
                    Clip clip = AudioSystem.getClip();
                    clip.open(AudioSystem.getAudioInputStream(wavFile));
                    clip.start();
                } catch (Exception ex) {
                    System.out.println(ex);
                }
            }
        });

        frame.add(playButton);
        frame.setSize(300, 200);
        frame.setLayout(null);
        frame.setVisible(true);
    }
}
- Output: A clickable button within a GUI that plays sound.
Testing and Debugging
- Debugging Tip: If no sound plays, check:
- The audio file path.
- If the
.wavfile is properly encoded.
- Testing: Verify playback on different platforms to ensure compatibility.
Conclusion
Congratulations! You have now learned how to:
- Design a simple GUI in Java.
- Play audio in your application using the
ClipandAudioSystemclasses.
Looking to explore more? Try integrating MP3 support or creating a playlist in Java.
YouTube Video