RadioButton in JavaFX Tutorial
RadioButton in JavaFX is part of the choice buttons in JavaFX, and you can select one or more selections. The RadioButton Class inherits from the ToggleButton class. So this control has all the features of a toggle button in JavaFX, but the Radio Button’s appearance is different, unlike the ToggleButton in JavaFX.
Since the RadioButton is similar to ToggleButton, it also has two states, selected and unselected. This tutorial will show you how to use the Radio Button and learn something new. If you are a beginner, I will walk you through the process of using the Radio Button. The following examples in this tutorial will be easy to learn and understand.
Examples include creating the Radio Button, displaying it in the scene, changing the text, changing the font and size, adding an icon, and more.
JavaFX Radio Button Example
The first step we are going to learn in this tutorial is to create the JavaFX RadioButton and show you the code snippet, so you can easily copy the code. Let’s proceed to get started.
// Create the RadioButton
RadioButton rb = new RadioButton("This is a RadioButton");
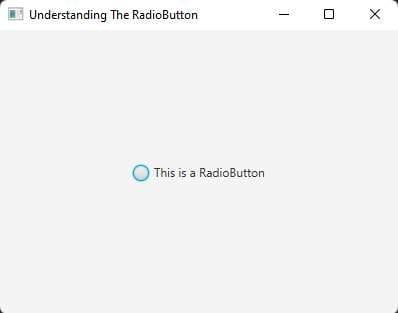
That’s how you create the RadioButton, it is pretty simple and easy to remember using its constructor. The next step we’ll be going to do is to add the RadioButton to the Scene Graph. You also need to have a layout in JavaFX. The layout is a very important container in JavaFX. The following code snippet will be adding the node to the scene graph.
// create the layout
StackPane root = new StackPane();
Scene scene = new Scene(root, 400, 400);
stage.setScene(scene);

// create the node and add to the layout
RadioButton rb = new RadioButton("This is a RadioButton");
root.getChildren().add(rb);
stage.setTitle("Understanding The RadioButton");
stage.show();
Output
Determining JavaFX RadioButton State
To determine whether the RadioButton is selected or not is very easy, the RadioButton class has the method isSelected() to determine the selected state. The isSelected() method returns a boolean value of true or false. If the RadioButton is selected, it returns a boolean value of true. Otherwise, it is false. See the following code snippet below to learn more.
if(rb.isSelected()){
   System.out.print("RadioButton is selected");
}else{
   System.out.print("RadioButton is unselected");
}
Setting Text in RadioButton
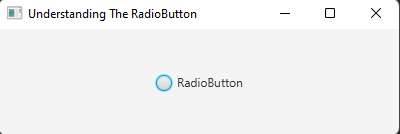
Setting or changing the text in JavaFX RadioButton is also simple. It can be done by using the setter or the setText() method. If you want to change the text of the RadioButton you can use the setText() method. See the code snippet below to learn more.
RadioButton rb = new RadioButton("This is a RadioButton");
rb.setText("RadioButton");
Output
Settings Style or CSS
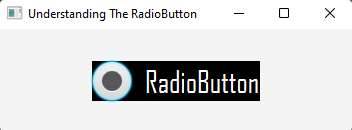
JavaFX also allows the developer to add CSS to your JavaFX application. Adding CSS to an application makes it more beautiful and has a higher chance to be loved by the users. Use the setStyle() method to add styles to your application or make an external CSS file. See the following code snippet below to learn more about how to add styles to your JavaFX application.
// setting style using the setStyle() method
RadioButton rb = new RadioButton("RadioButton");
rb.setStyle("-fx-background-color: black; -fx-text-fill: white; -fx-font-size: 30; -fx-font-family: 'Agency FB'");
Output
YouTube Video
RadioButton ToggleGroup
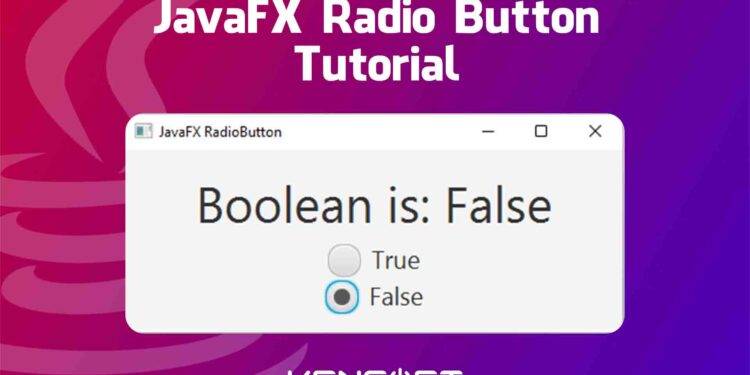
ToggleGroup allows you to select one in RadioButton at a time. For example, you have choices in your application and the user must only select one radio button. That’s how the ToggleGroup works in JavaFX. In this example, I will display true or false using the JavaFX RadioButton and the user can only select one of the buttons, and we will also determine which button will be selected.
To determine which radio button is selected inside the toggle group is different, unlike the example above using the isSelected() method and this one is a bit complex. The following code snippet below will give you an idea and help you learn more about the toggle group and read the selected radio button.
// Creating the toggle group
RadioButton rbTrue = new RadioButton("True");
RadioButton rbFalse = new RadioButton("False");
ToggleGroup group = new ToggleGroup();
group.getToggles().addAll(rbTrue,rbFalse);
rbTrue.setSelected(true);

// A global variable (Label)
status = new Label("Stat");

// root is JavaFX layout
root.getChildren().addAll(rbTrue, rbFalse,status);
group.selectedToggleProperty().addListener(this::changed);

// A method named changed for identifying the toggles
private void changed(ObservableValue<? extends Toggle> observable, Toggle oldBtn, Toggle newBtn) {
String selected = "None";
if(newBtn != null){
    selected = ((Labeled)newBtn).getText();
}
status.setText("Selected: "+selected);
}
Output








great broder!